
Making the Weekender Top: A free tutorial
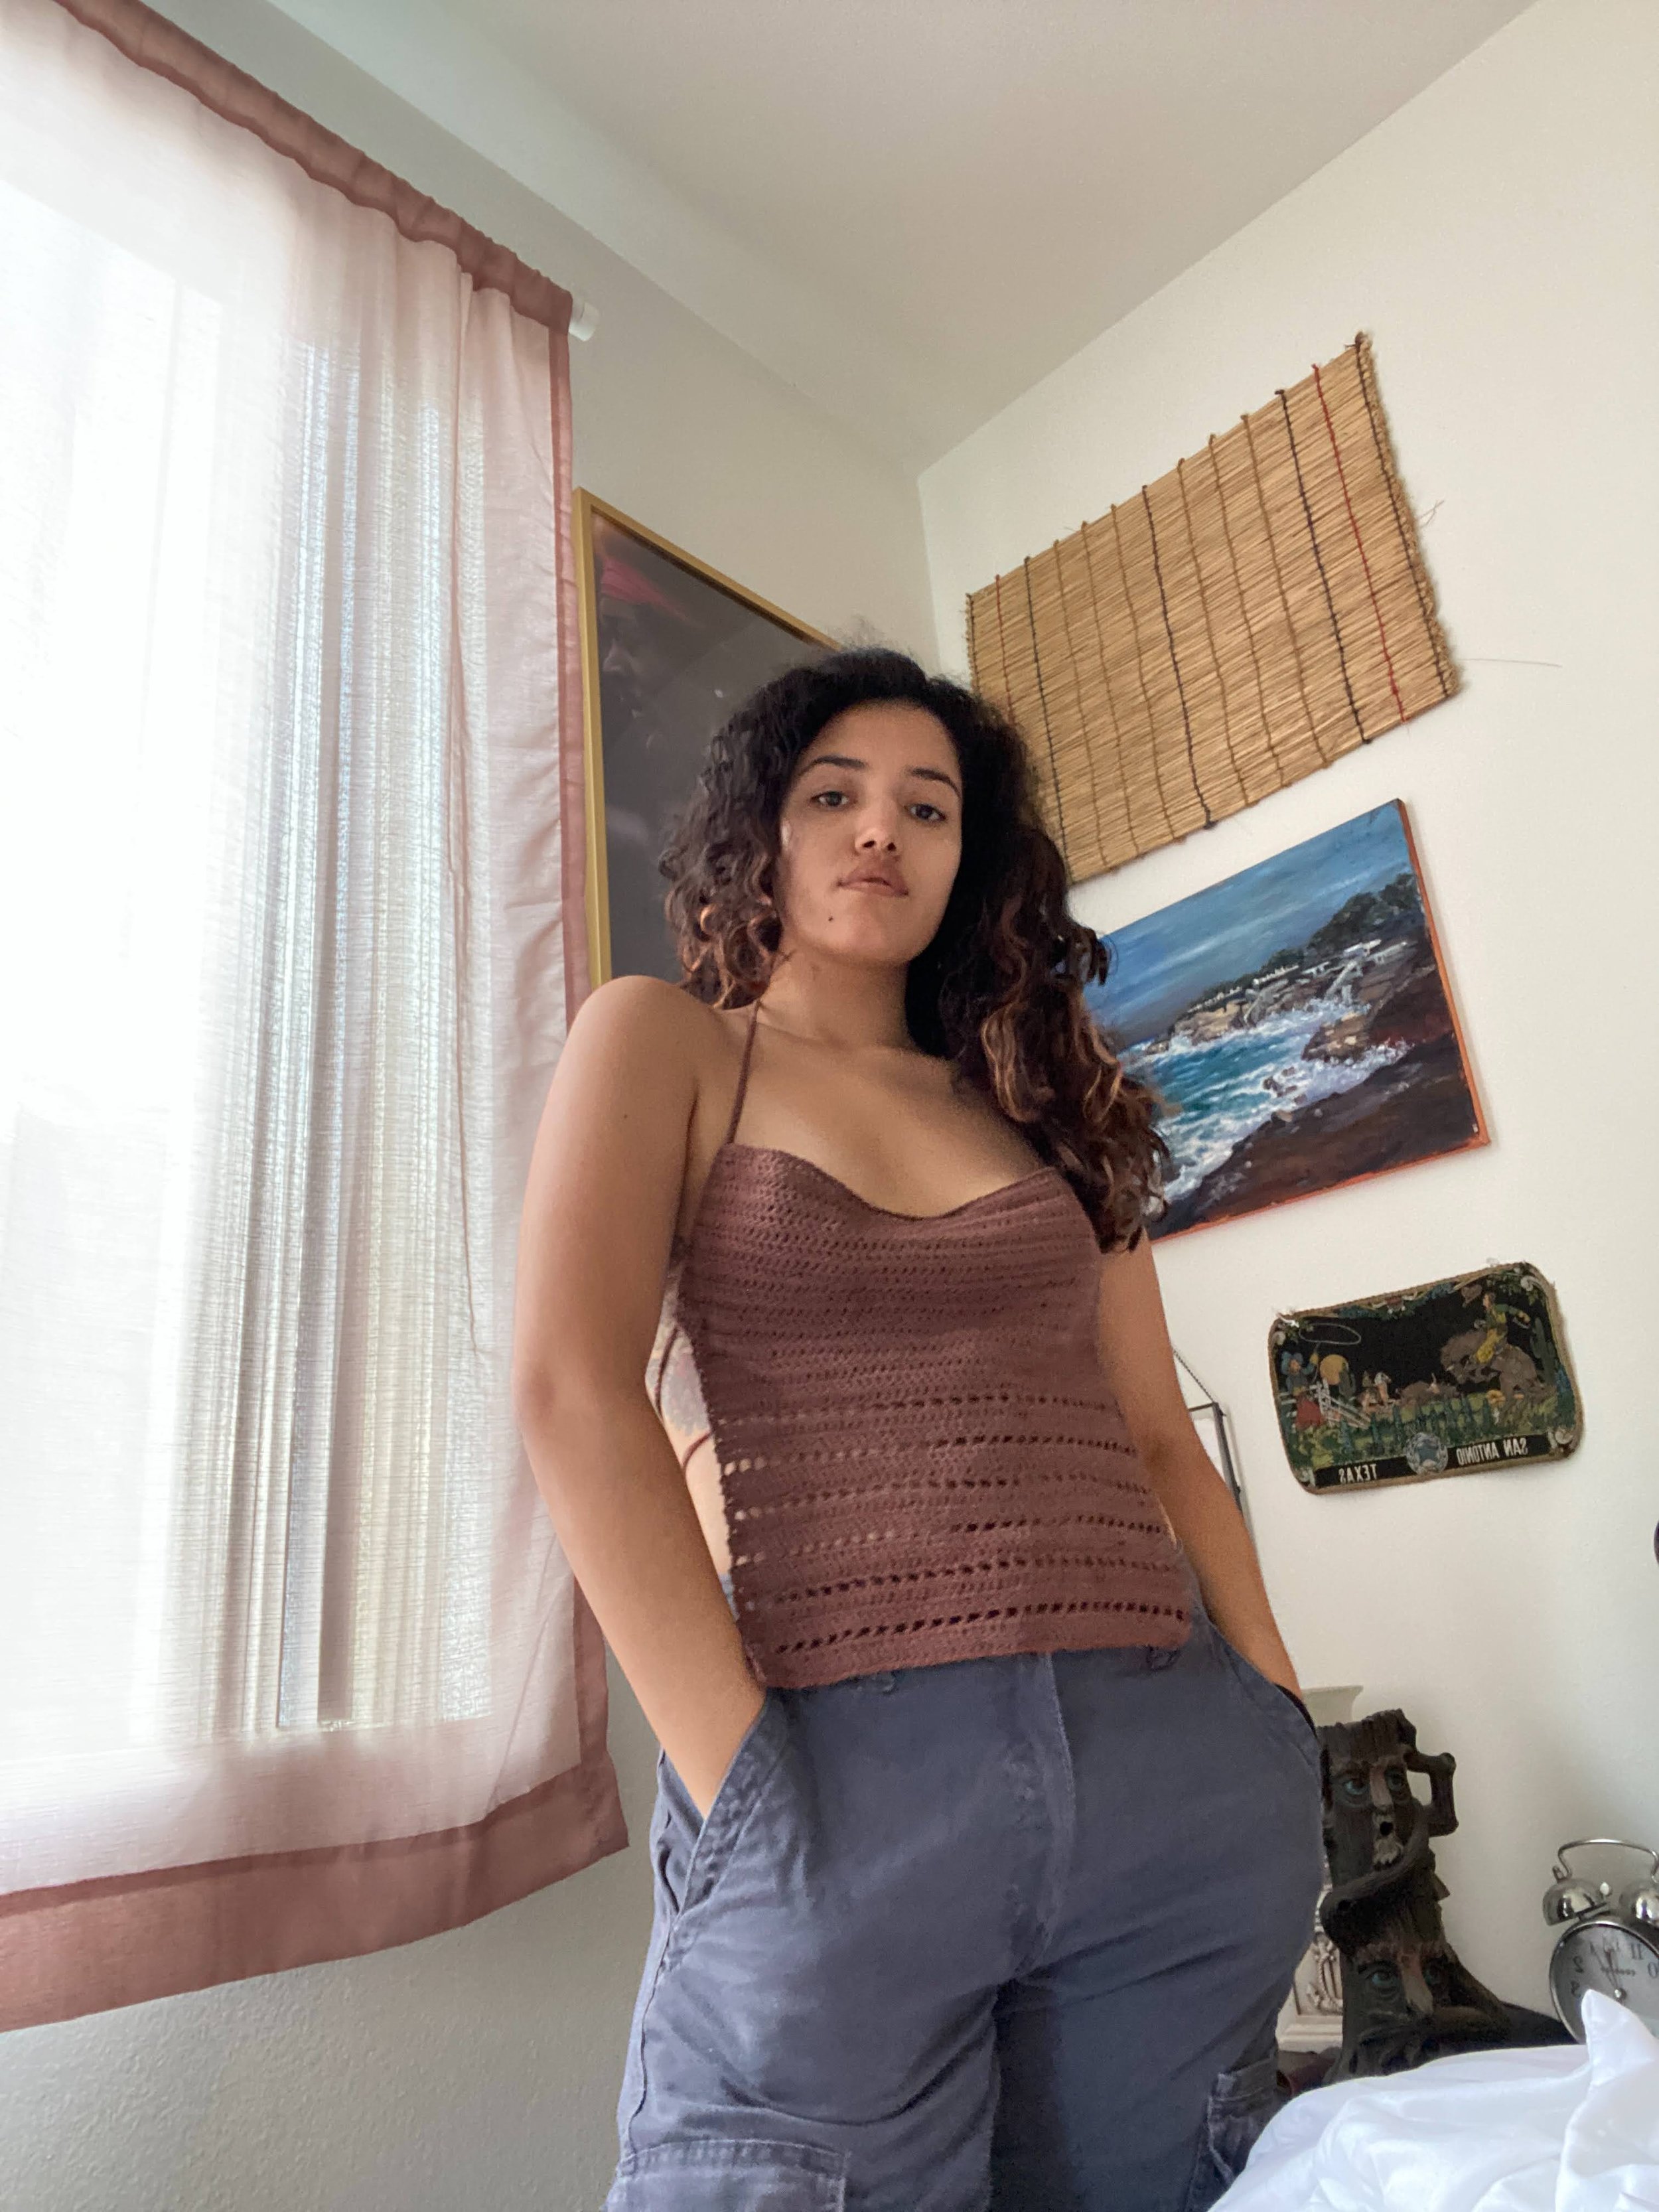
Ask and you shall receive! We voted on my Instagram stories and y’all decided that you wanted to see a crochet top pattern. We’re calling this top the Weekender Top cause it’s quick and easy to make in time to wear it out for the weekend. It took me about 3 evenings of work (around 6-8 hours?) to finish this little backless number. I’ve also included a few different ideas for how to tie the straps for different looks, but of course, play around and find your favorite!
MATERIALS
fingering weight yarn (I used hobbii cotton 8/4 yarn); this will vary depending on your size but I used probably around 100m-150m
3.5mm hook
stitch markers
tapestry needle
scissors
GAUGE:
17 dc = 4” (stitch gauge)
Gauge isn’t too important for this project as we’re doing something a little more freestyled. The length gauge isn’t included because we’ll be doing length by measurement. I’ll be giving instructions on how to freehand this and how to use gauge if that’s what you prefer
ABBREVIATIONS:
ch - chain
dc - double crochet
st - stitch
sk - skip
OVERVIEW
The construction of this top is straightforward and simple. First, crochet a chain to comfortably fit over the fullest part of your bust from pit to pit. Then work in dc until desired bust coverage is reached. Move an inch or so in from each side, and crochet down to form the body (forming a T shape). Then sew down the T to form casings and make straps to feed through. Weave in your ends and that’s it!
MAIN BODY PANEL
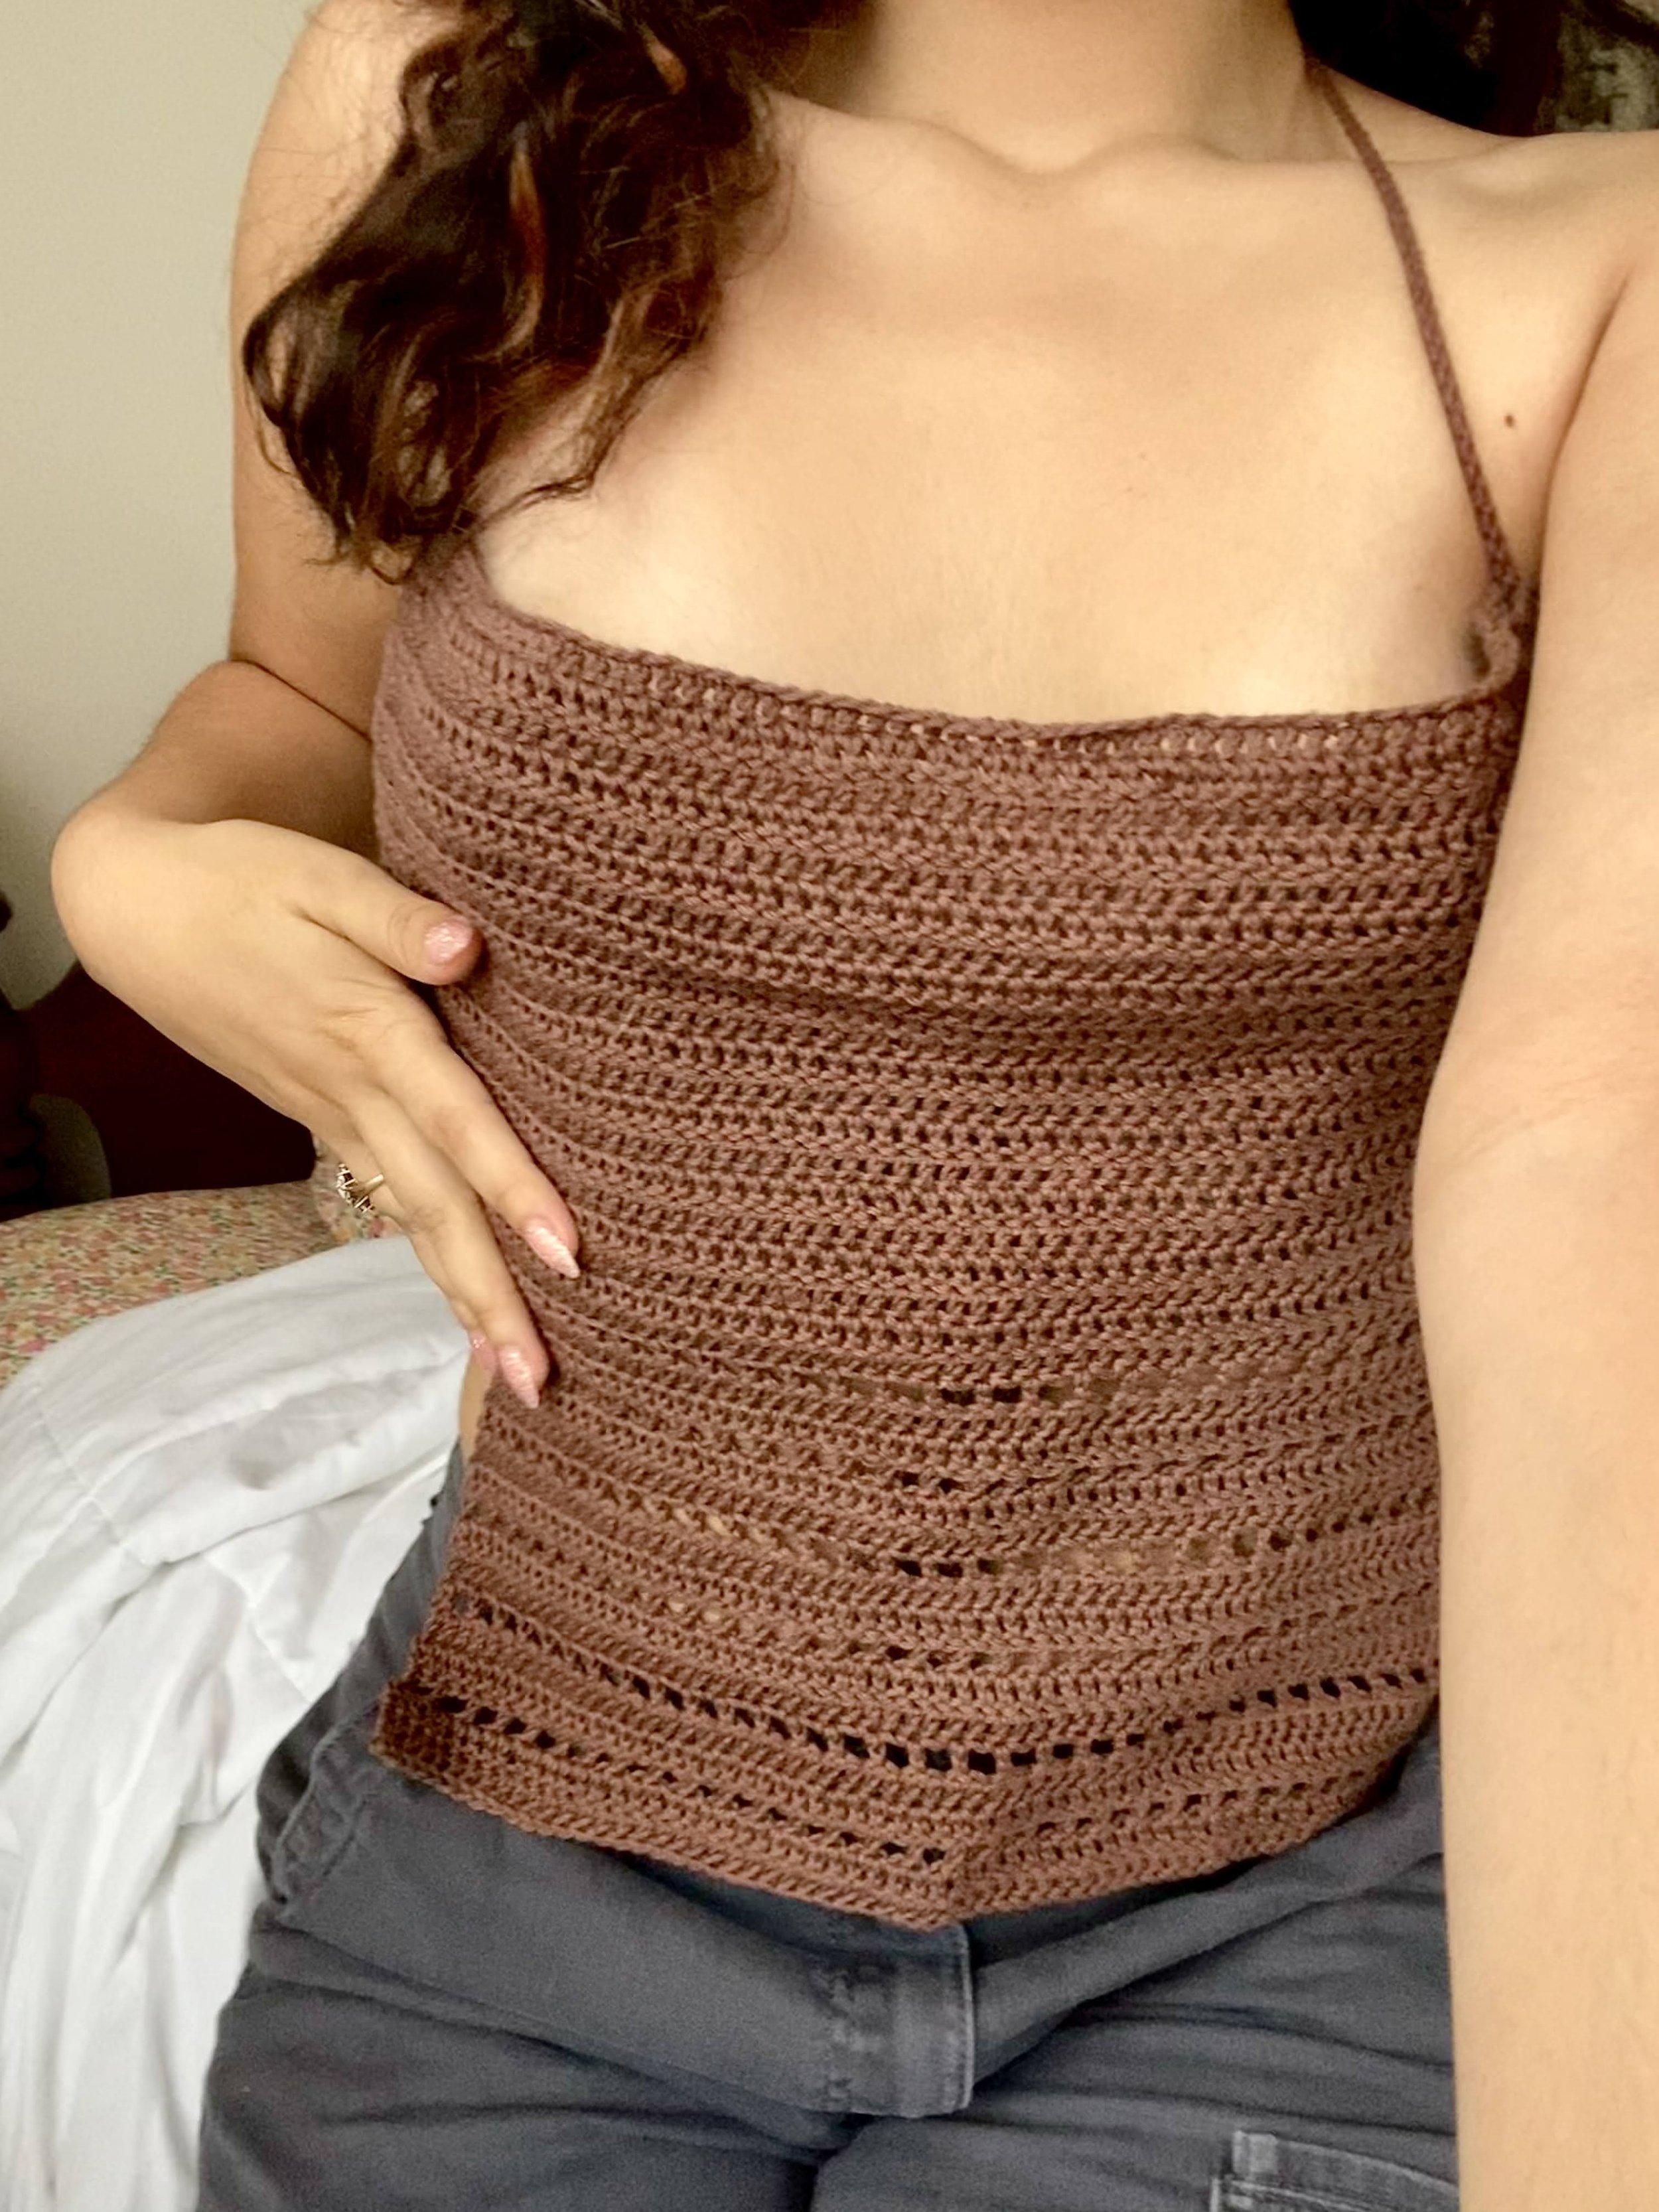
BUST SECTION:
FREEFORM: Make a chain that comfortably fits across the fullest part of your chest from pit to pit. Make sure to stretch the chain to get a better idea of how it will fit! If you want to incorporate lattice lace st, make sure to make this an odd number! Once you get to the chain to the length you want it to be, ch 16 more + 2 for turning chain. Work in dc until you reach your desired coverage for the bust. I like to have a bit of extra fabric so it can have a more gathered look once we put the strap through. At the end of each row Ch2 as your tuning ch (doesn’t count as a dc)
USING GAUGE: Measure across the front of your chest at the fullest point of your bust from pit to pit. Now using your gauge, complete the following calculation
# of inches/4” = A
A x 17 (# of st in gauge) = # of ch for starting chain. If you want to incorporate lattice lace st, make sure to round to an odd number!
To that chain, you’re then going to add 16 additional ch + 2 more ch (turning ch). Work in dc until you reach your desired coverage for the bust. To turn your work, ch2 and dc into the first st (ch2 doesn’t count as a st).
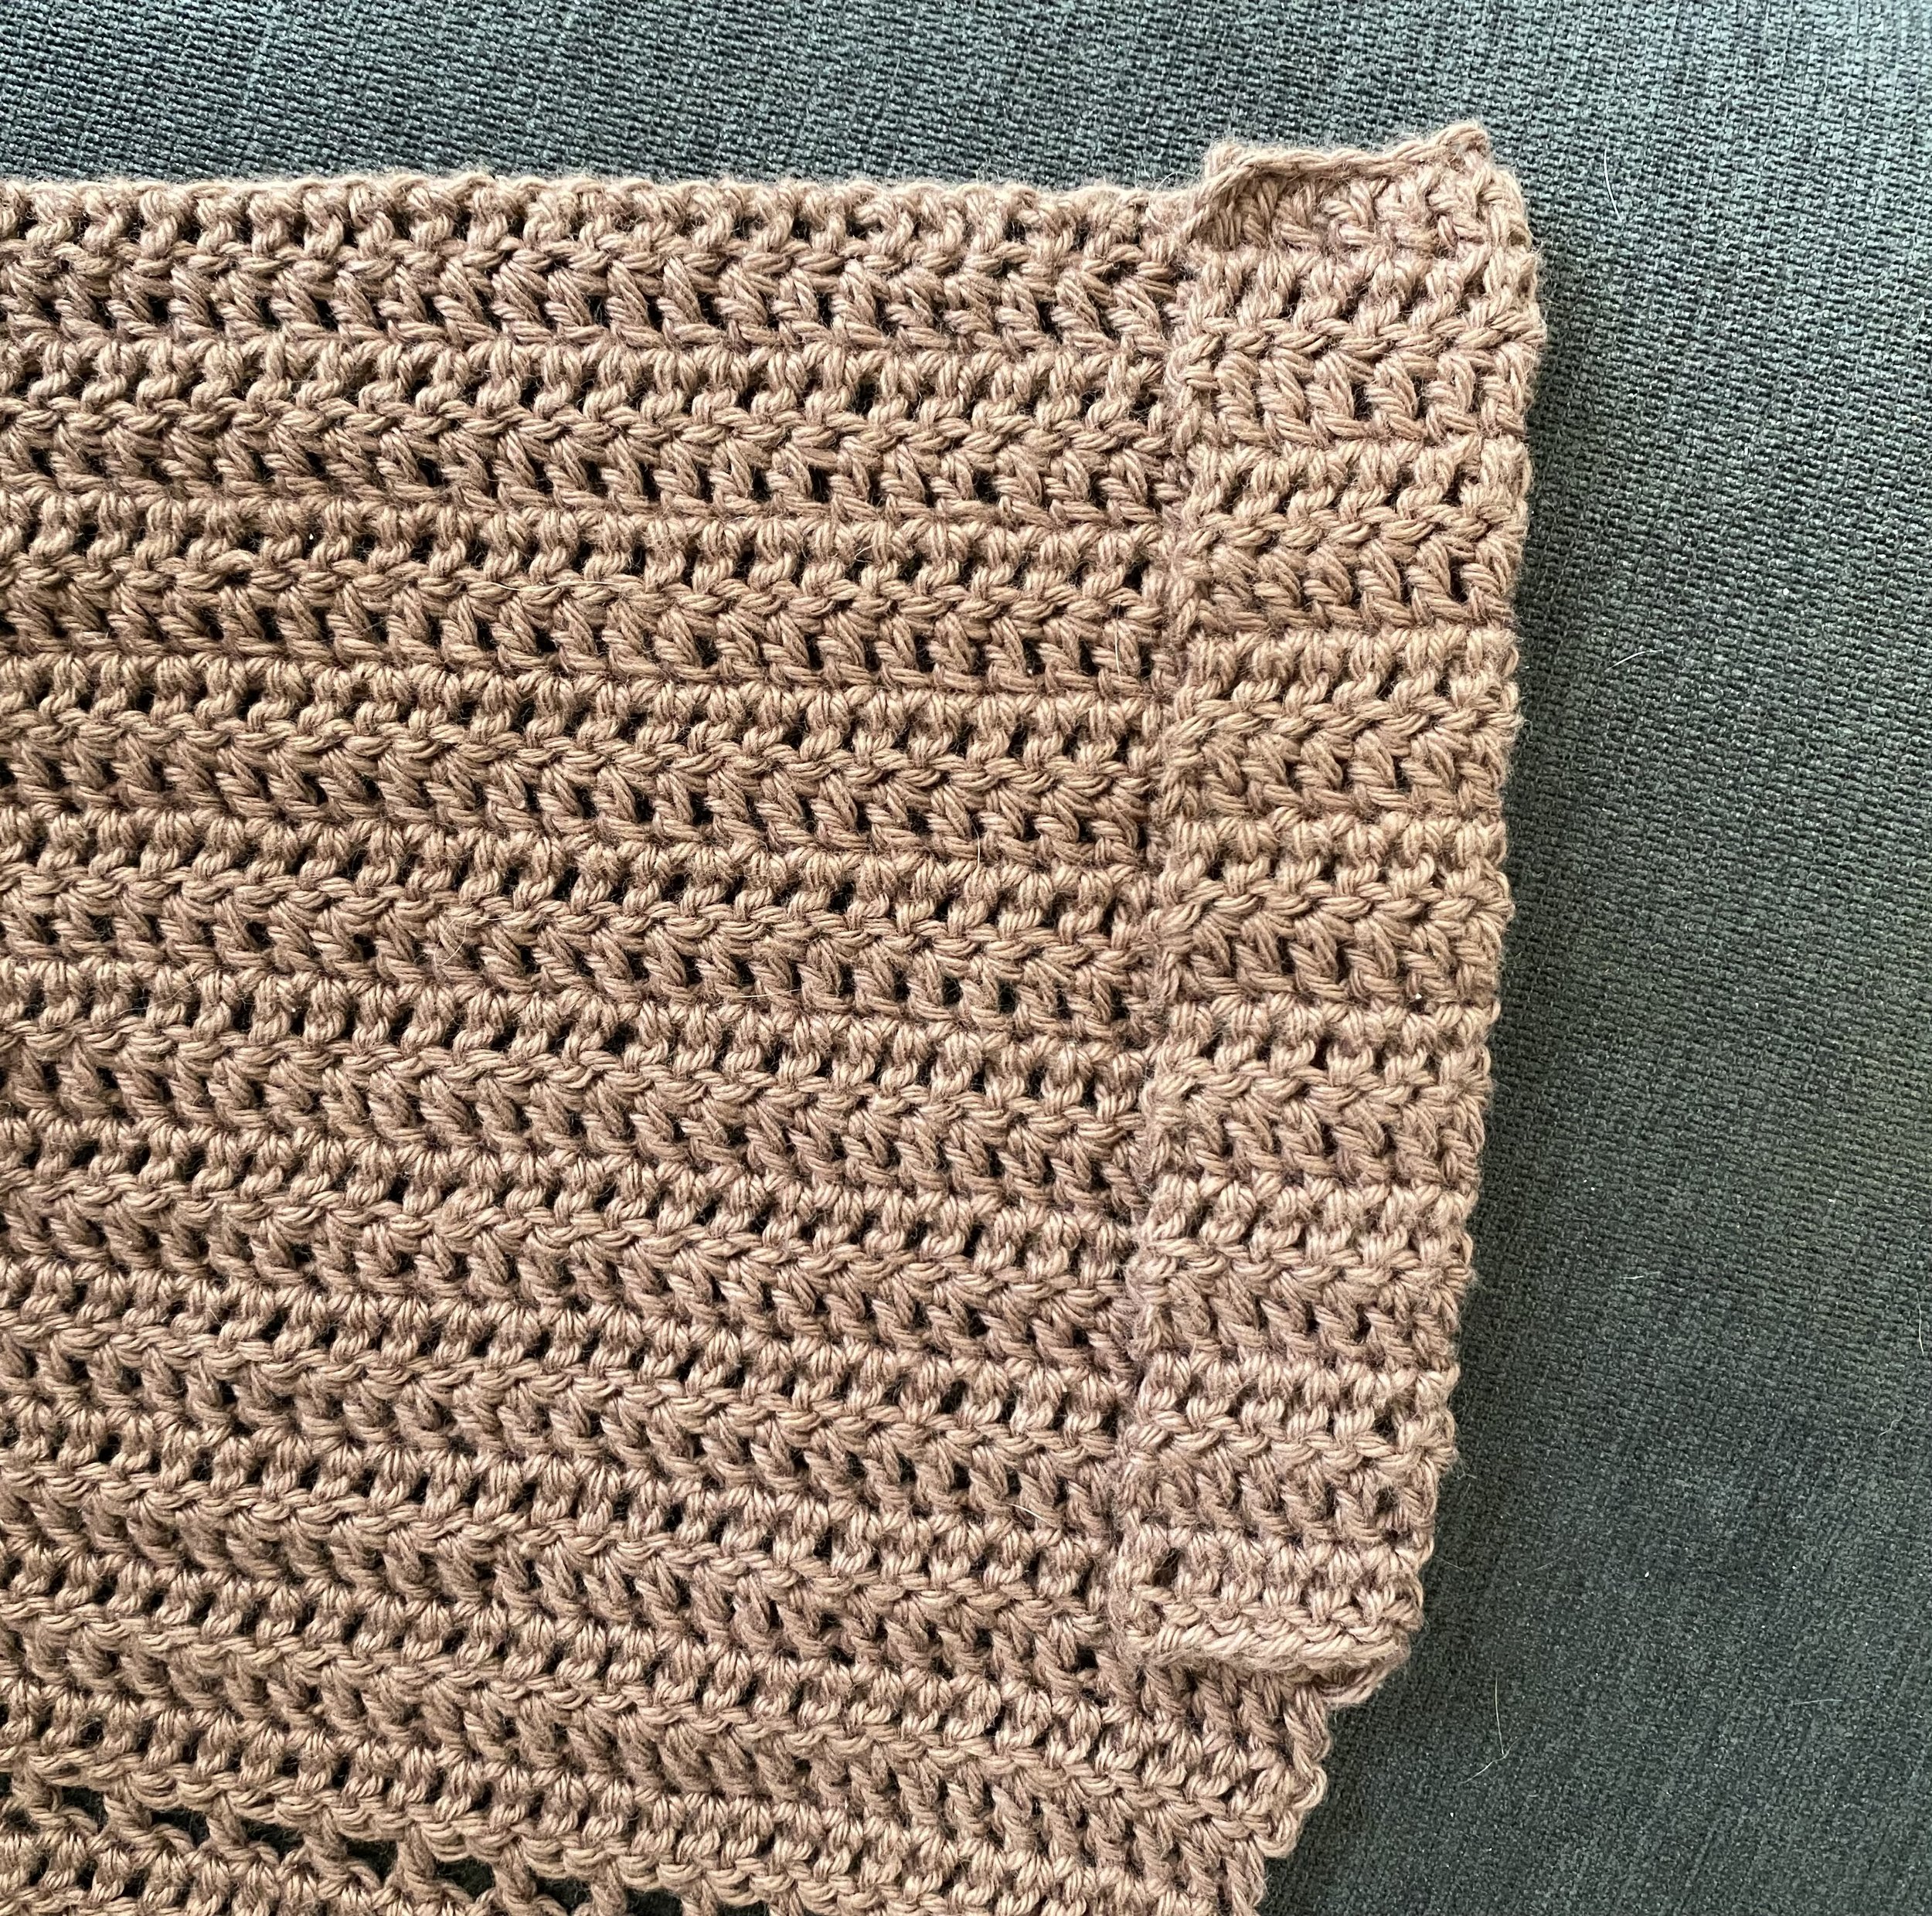
BODY SECTION:
There’s lots of wiggle room for the body section! I used a simple lattice lace for mine but feel free to give it your own twist! I’ll be showing you exactly what I did :)
Now that you have the coverage wanted in the bust, place a st marker 8st in from either end of your work.
Ch1, turn work over, slst 8st to st marker.
Ch2, dc until you reach the second marker. Ch2, turn work over, dc across. continue for a total of 5 dc rows.
It’s time to work a lattice lace row! To do this all you have to do is *1dc, ch1, skst * rpt between * until 1 st remains. Finish off your row with a dc.
For the amount of coverage I wanted, I did 1 lattice row followed by 2 dc rows (3 row rpt) 6 times for a total of 18 rows + 5 inital rows. Go ahead and do however many rows feels right to you and then Ch1, fasten off.

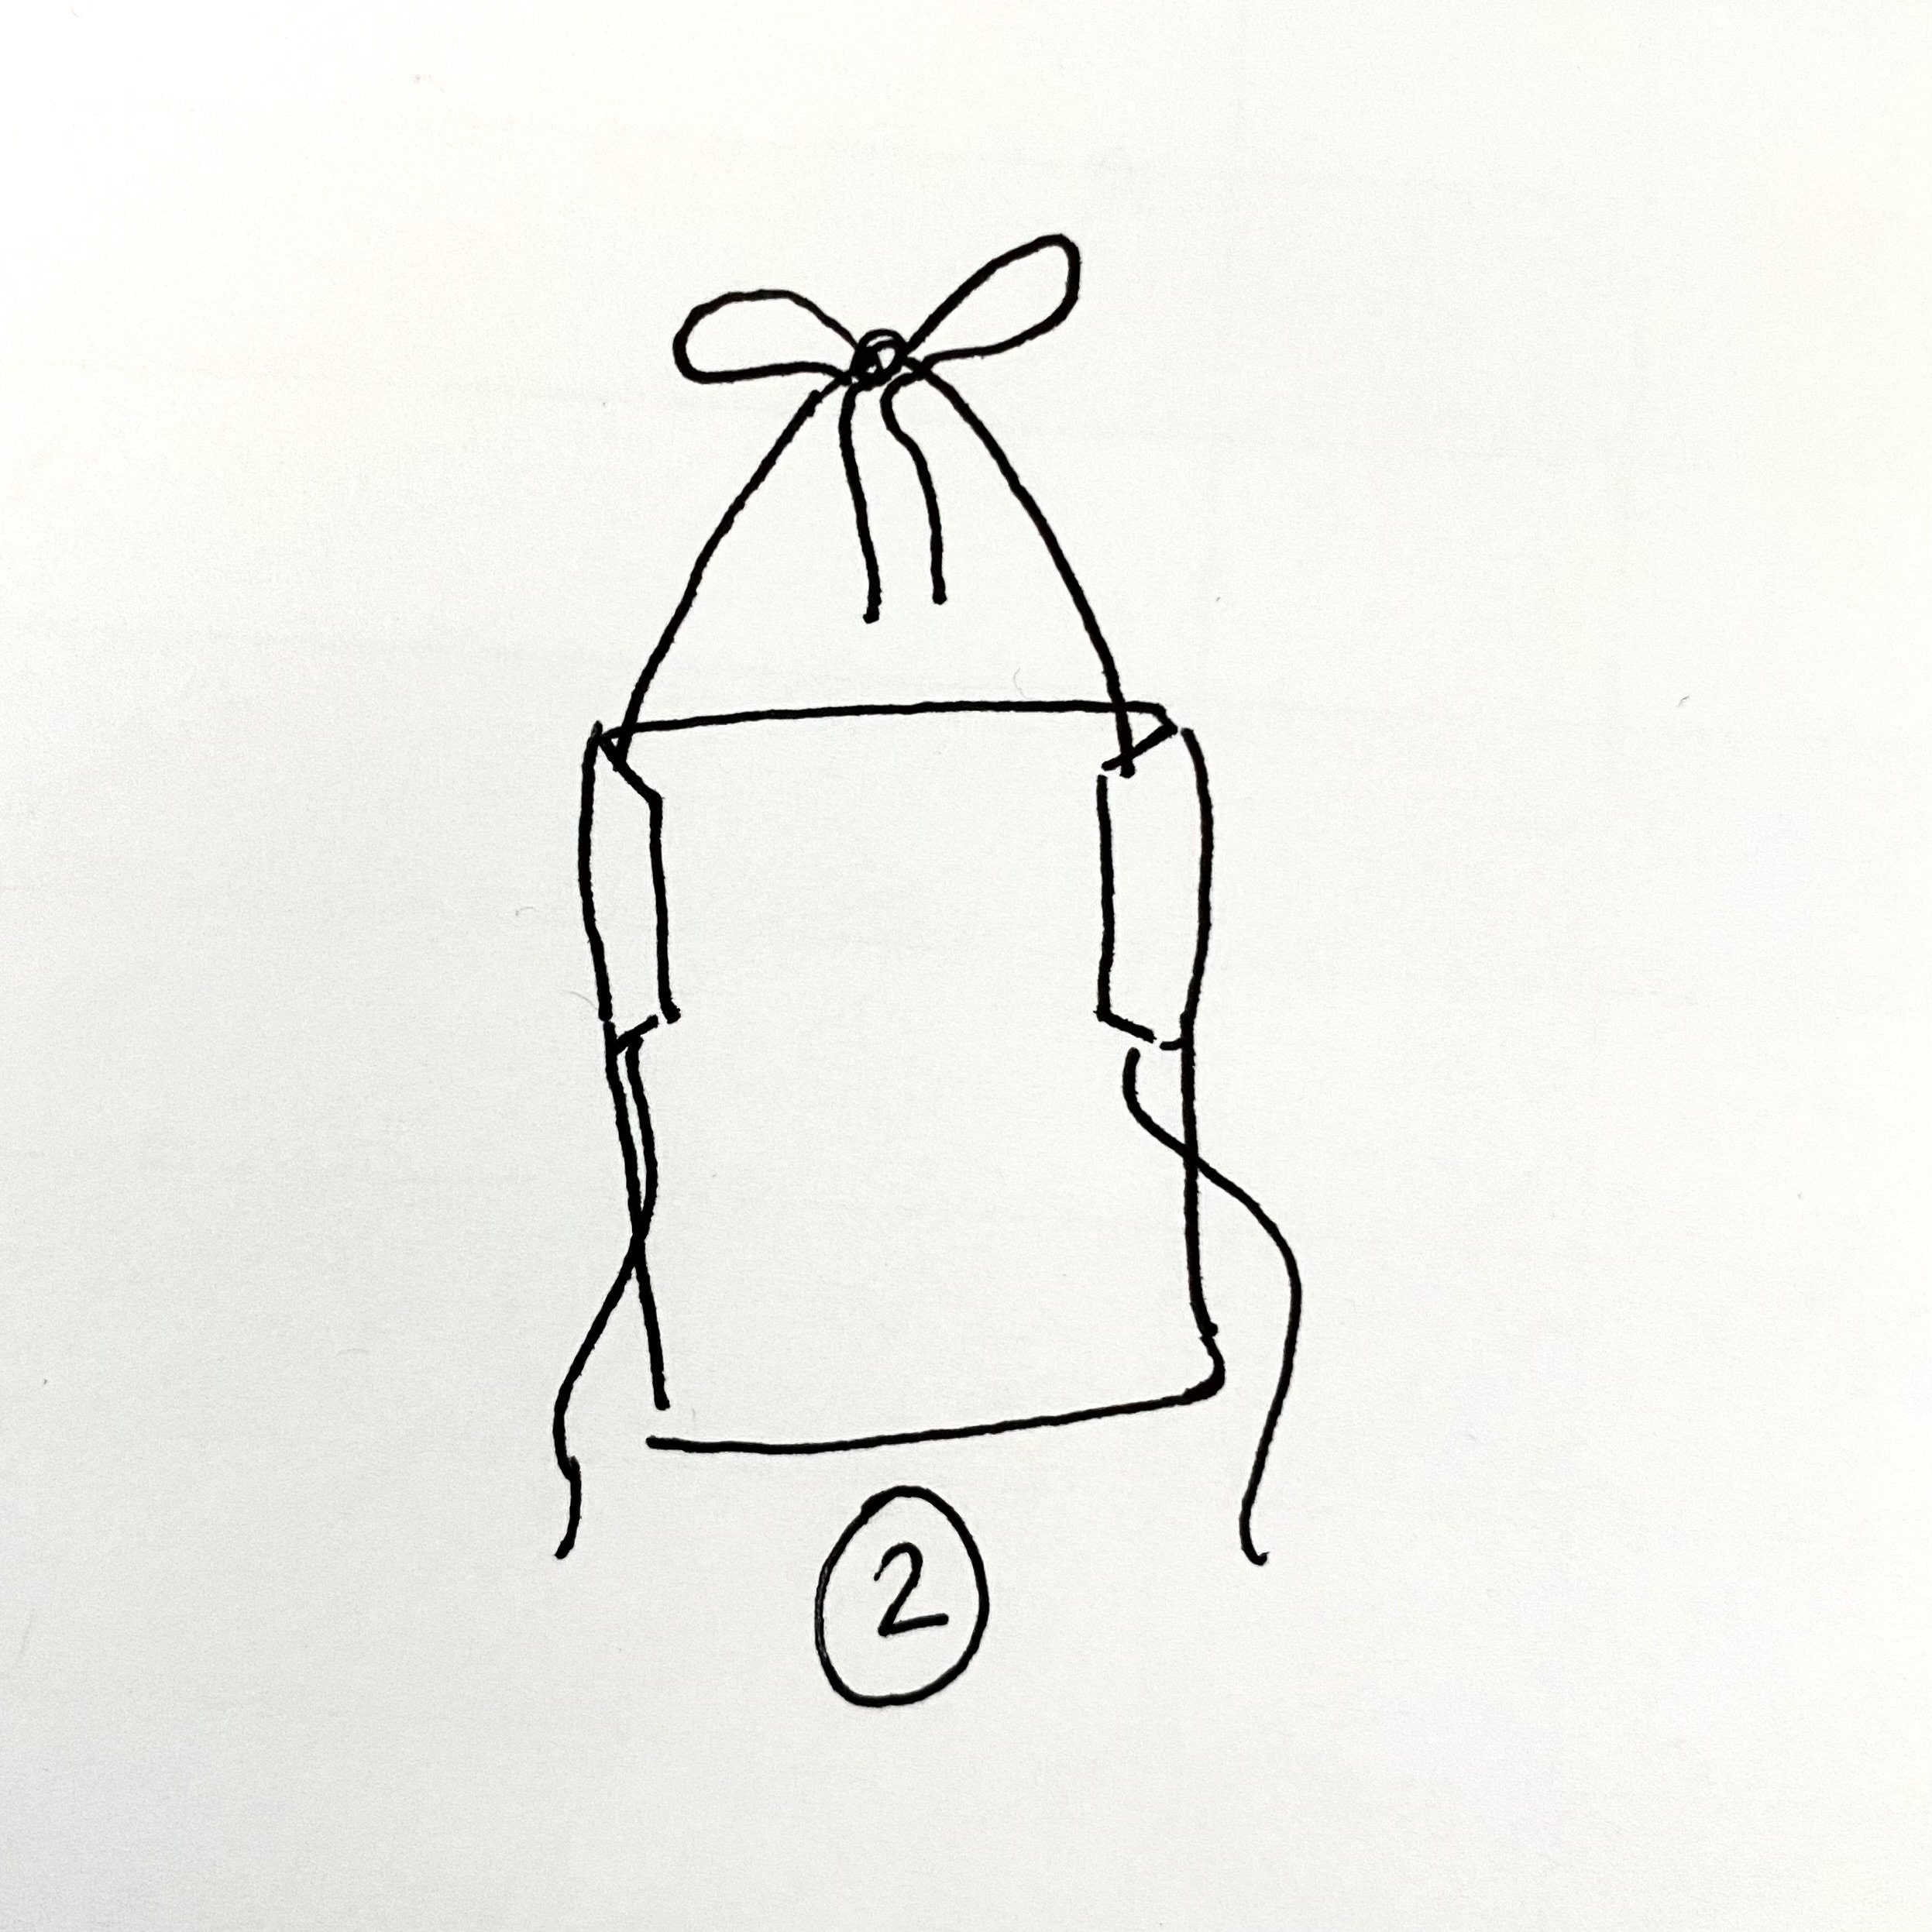
You should be left with something that looks like this!
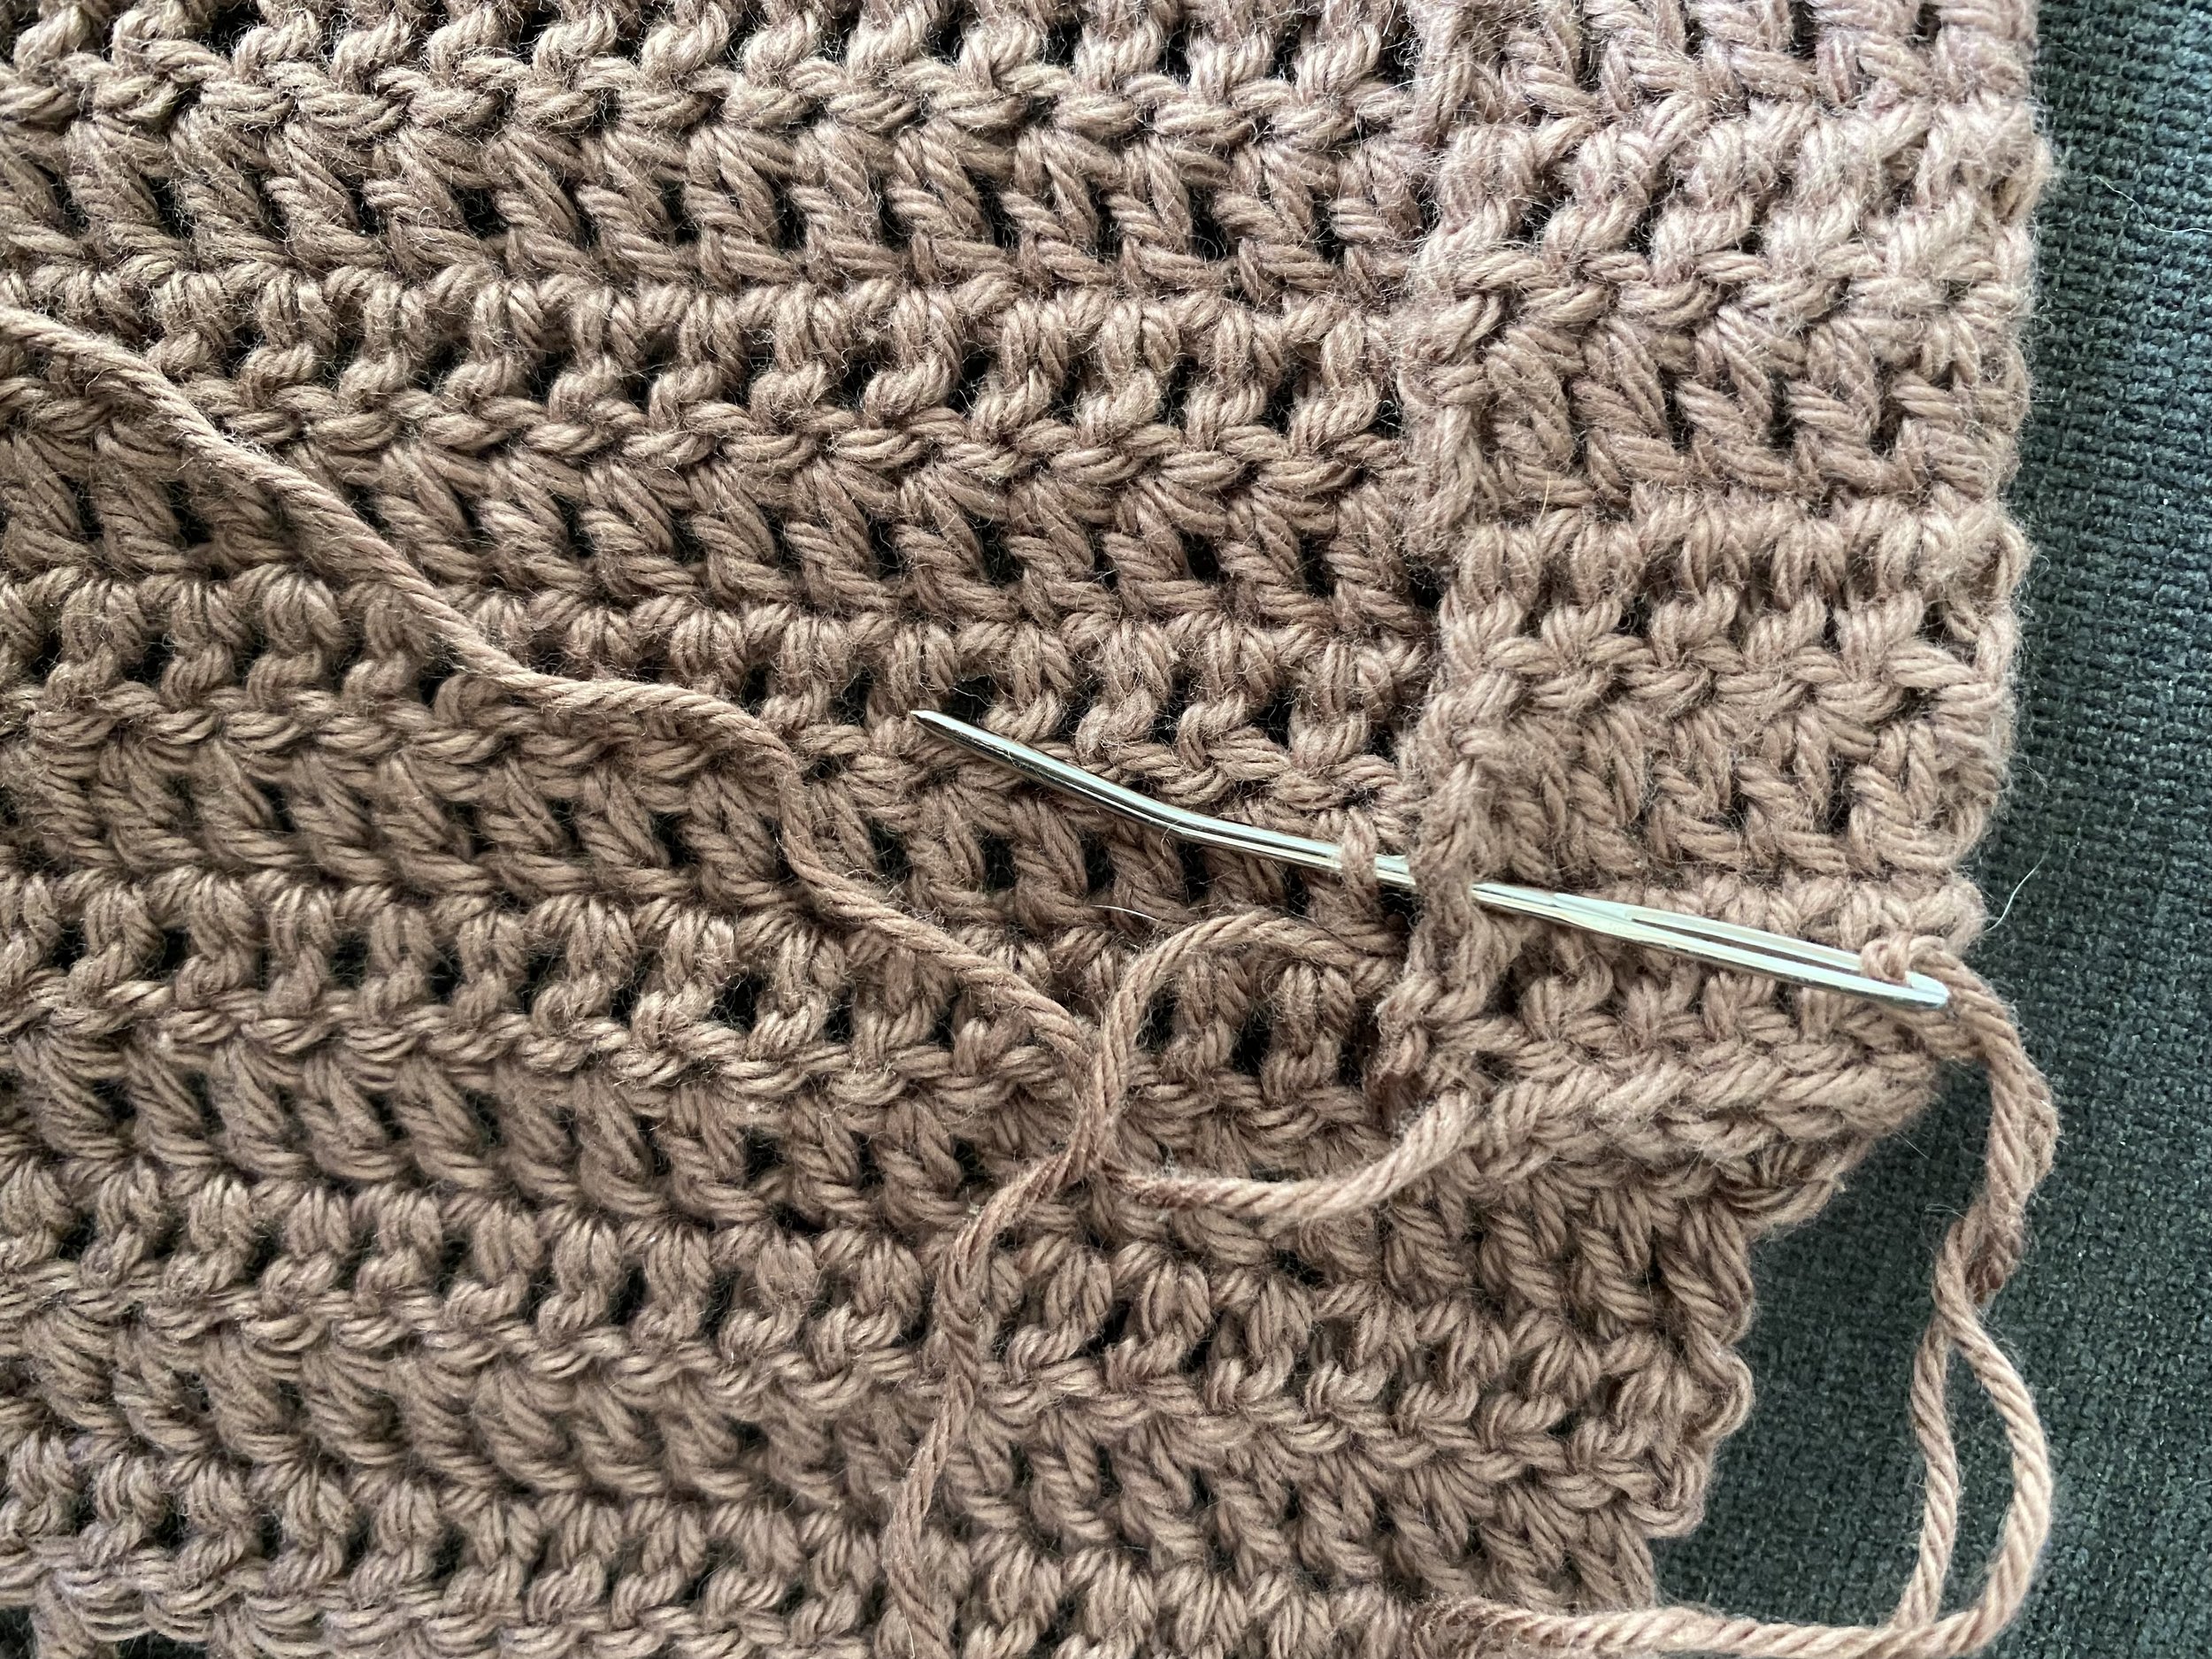
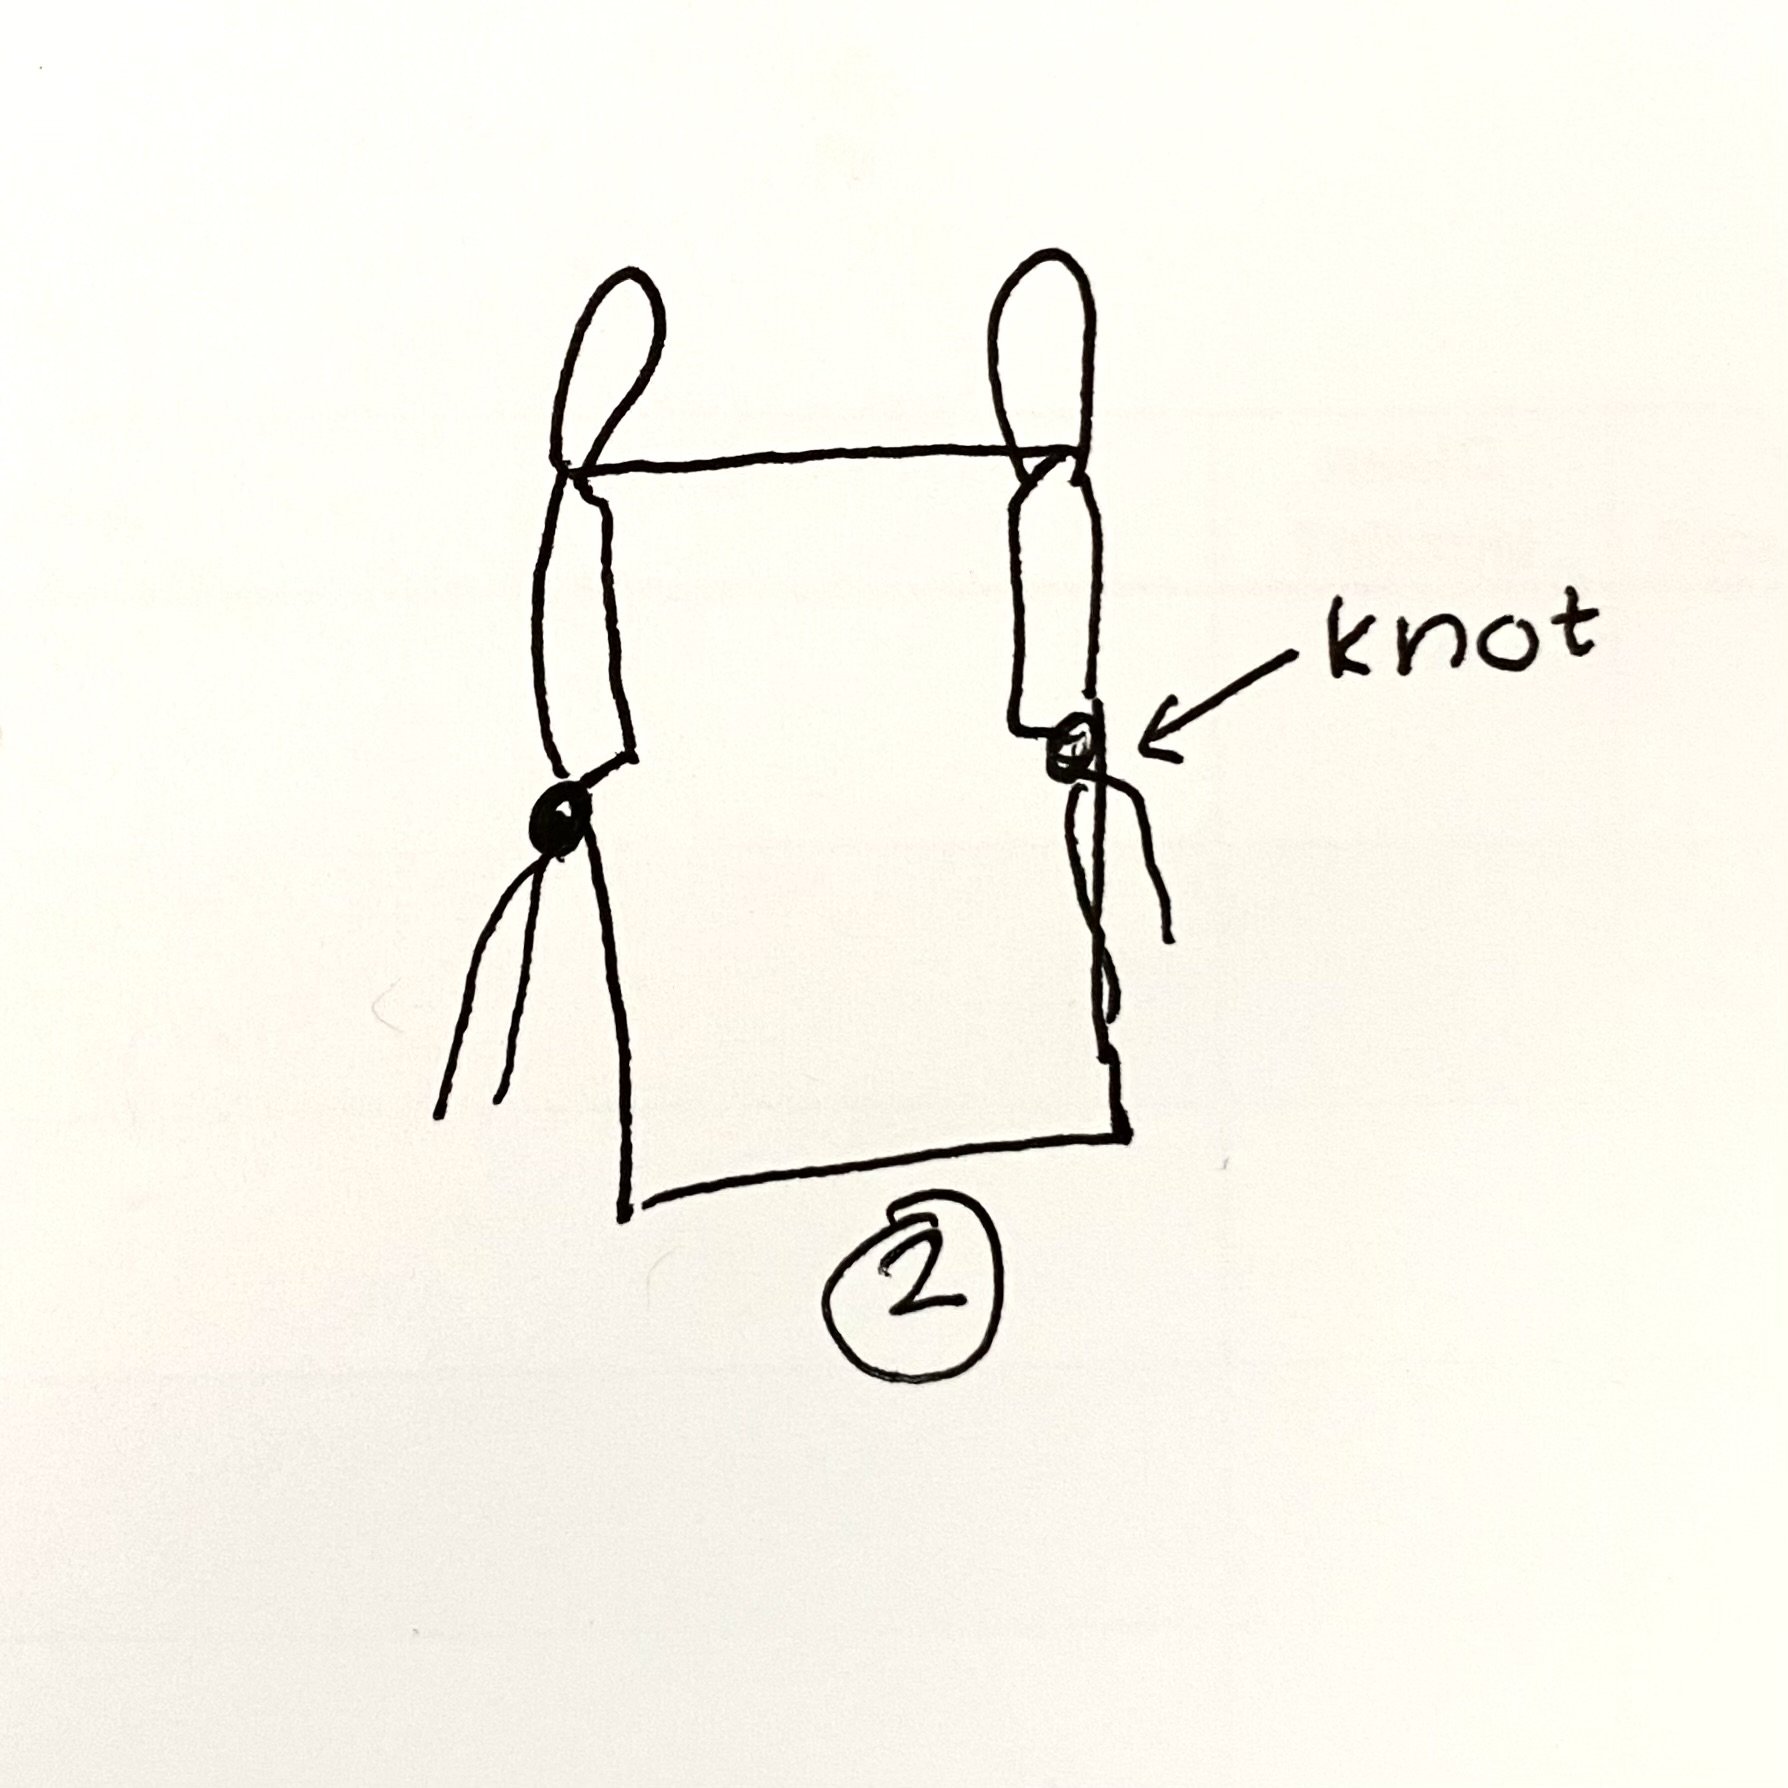
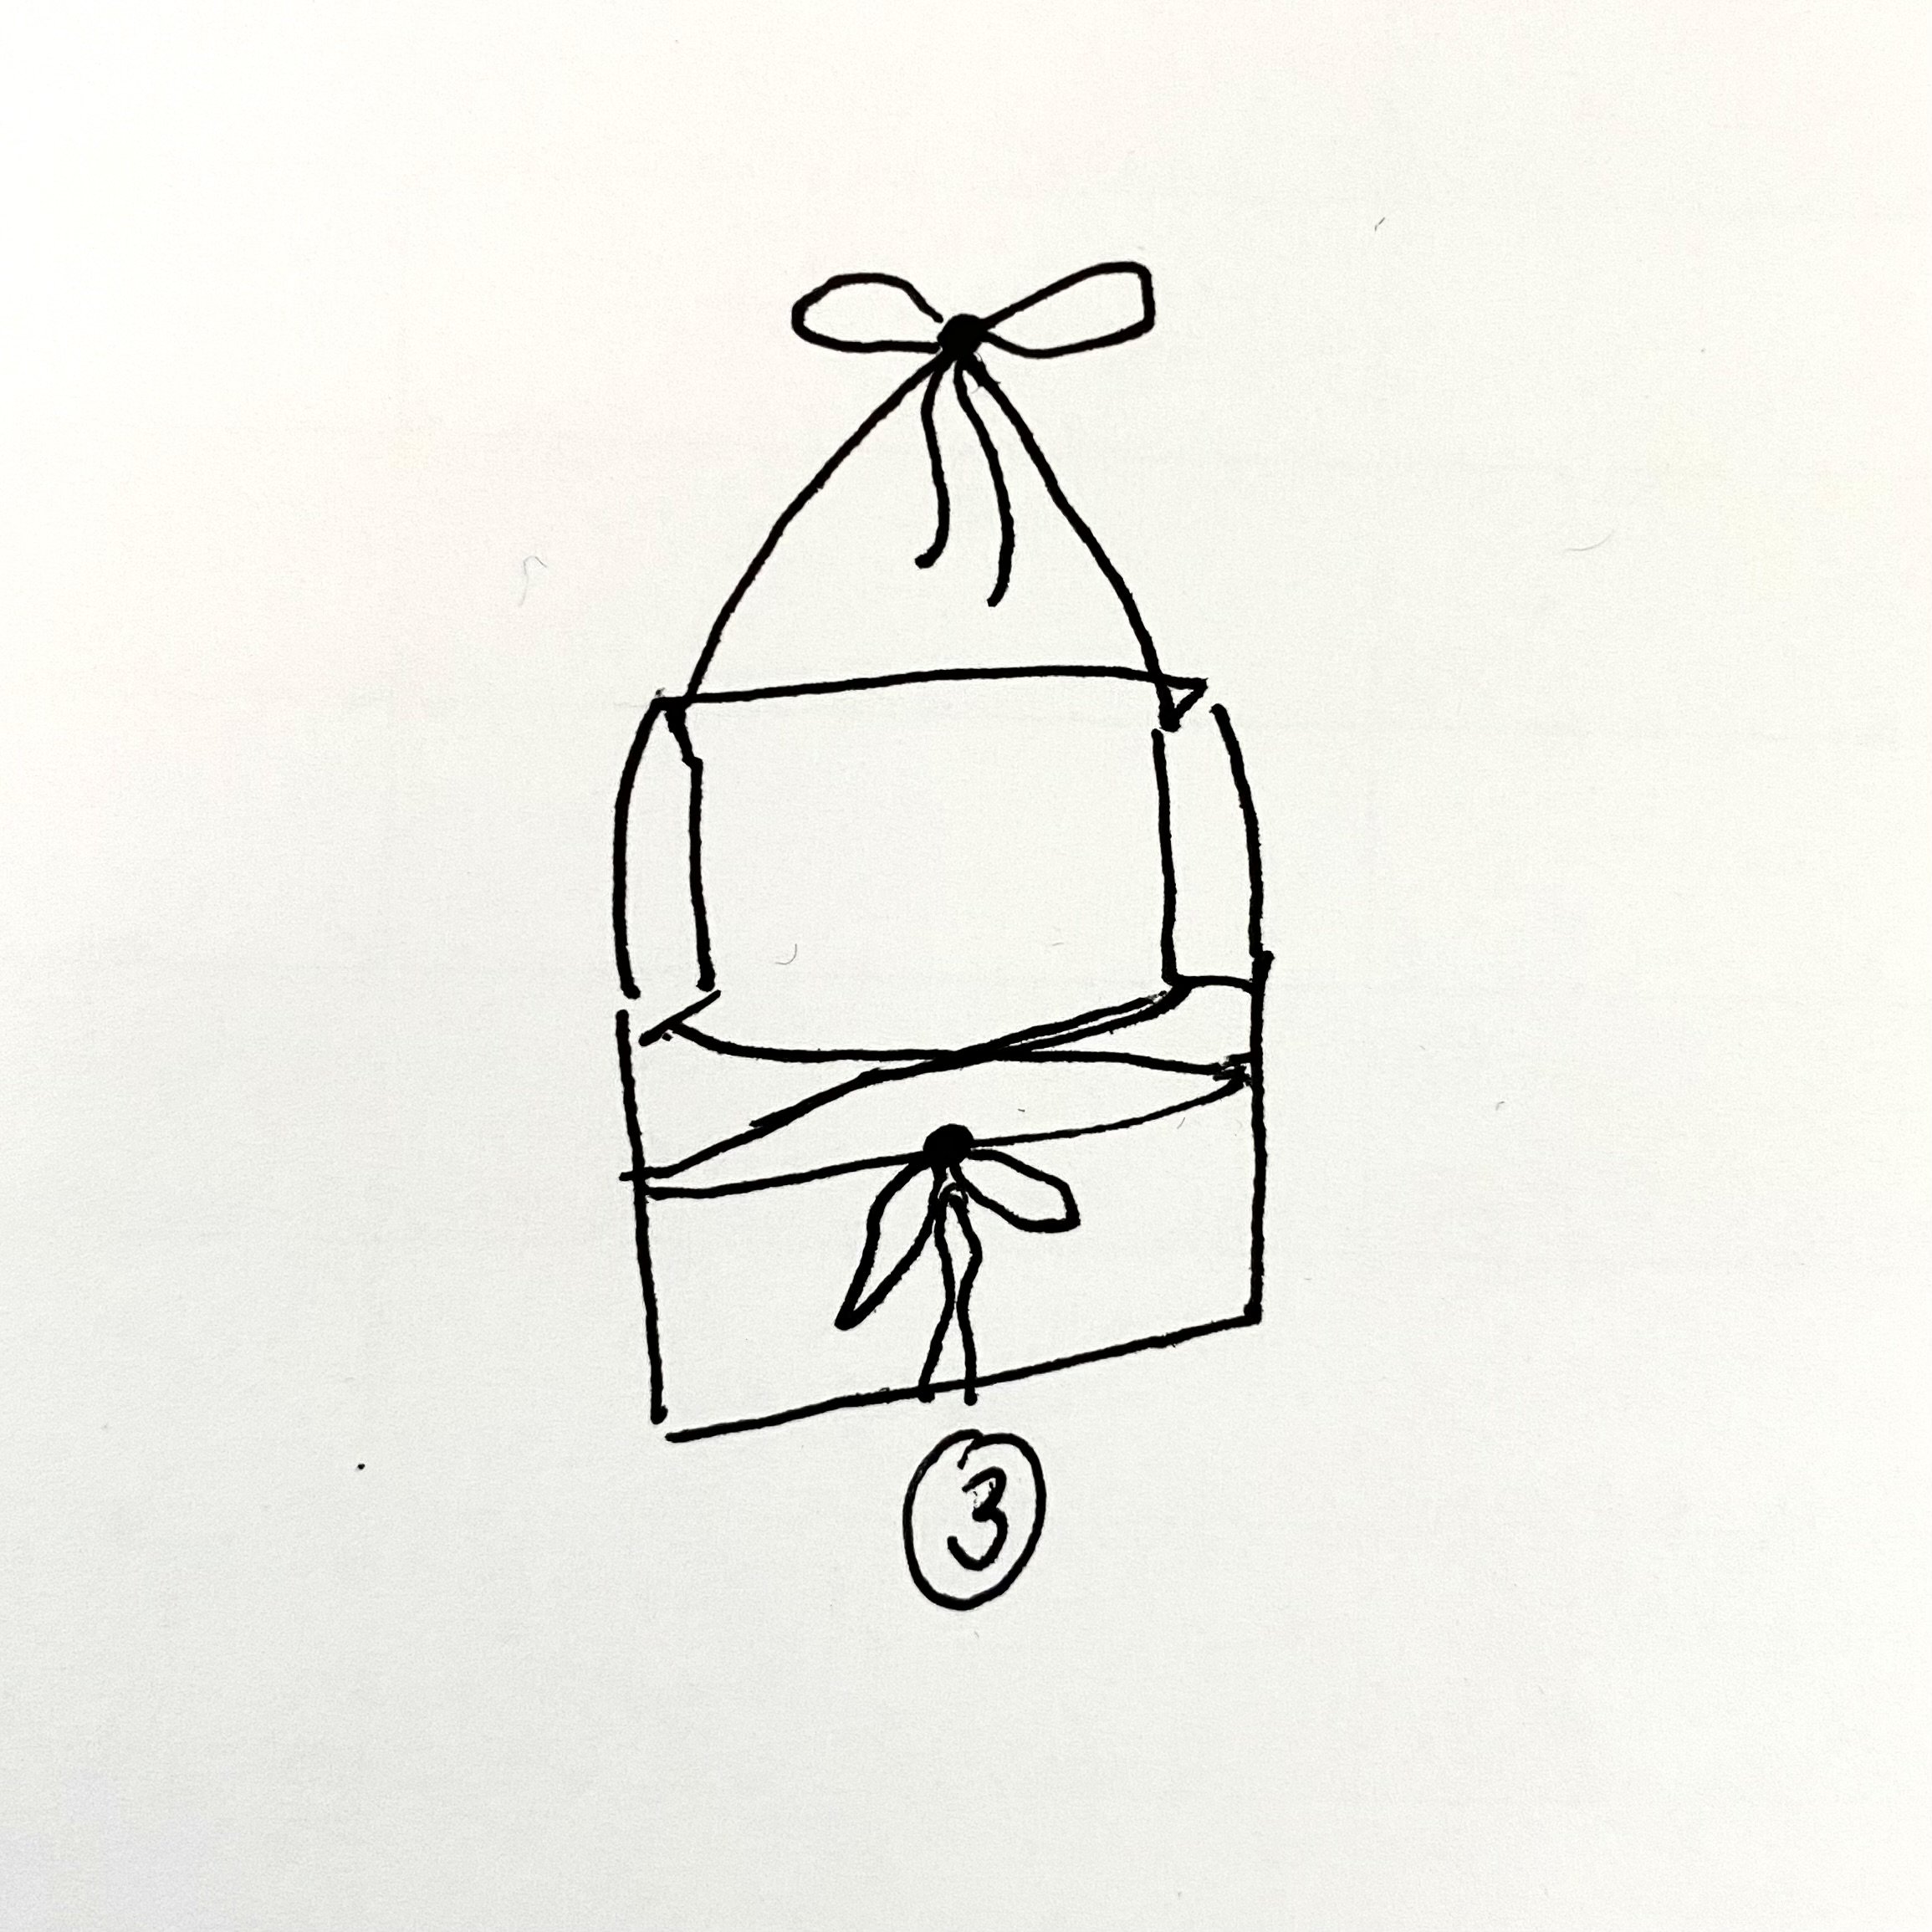
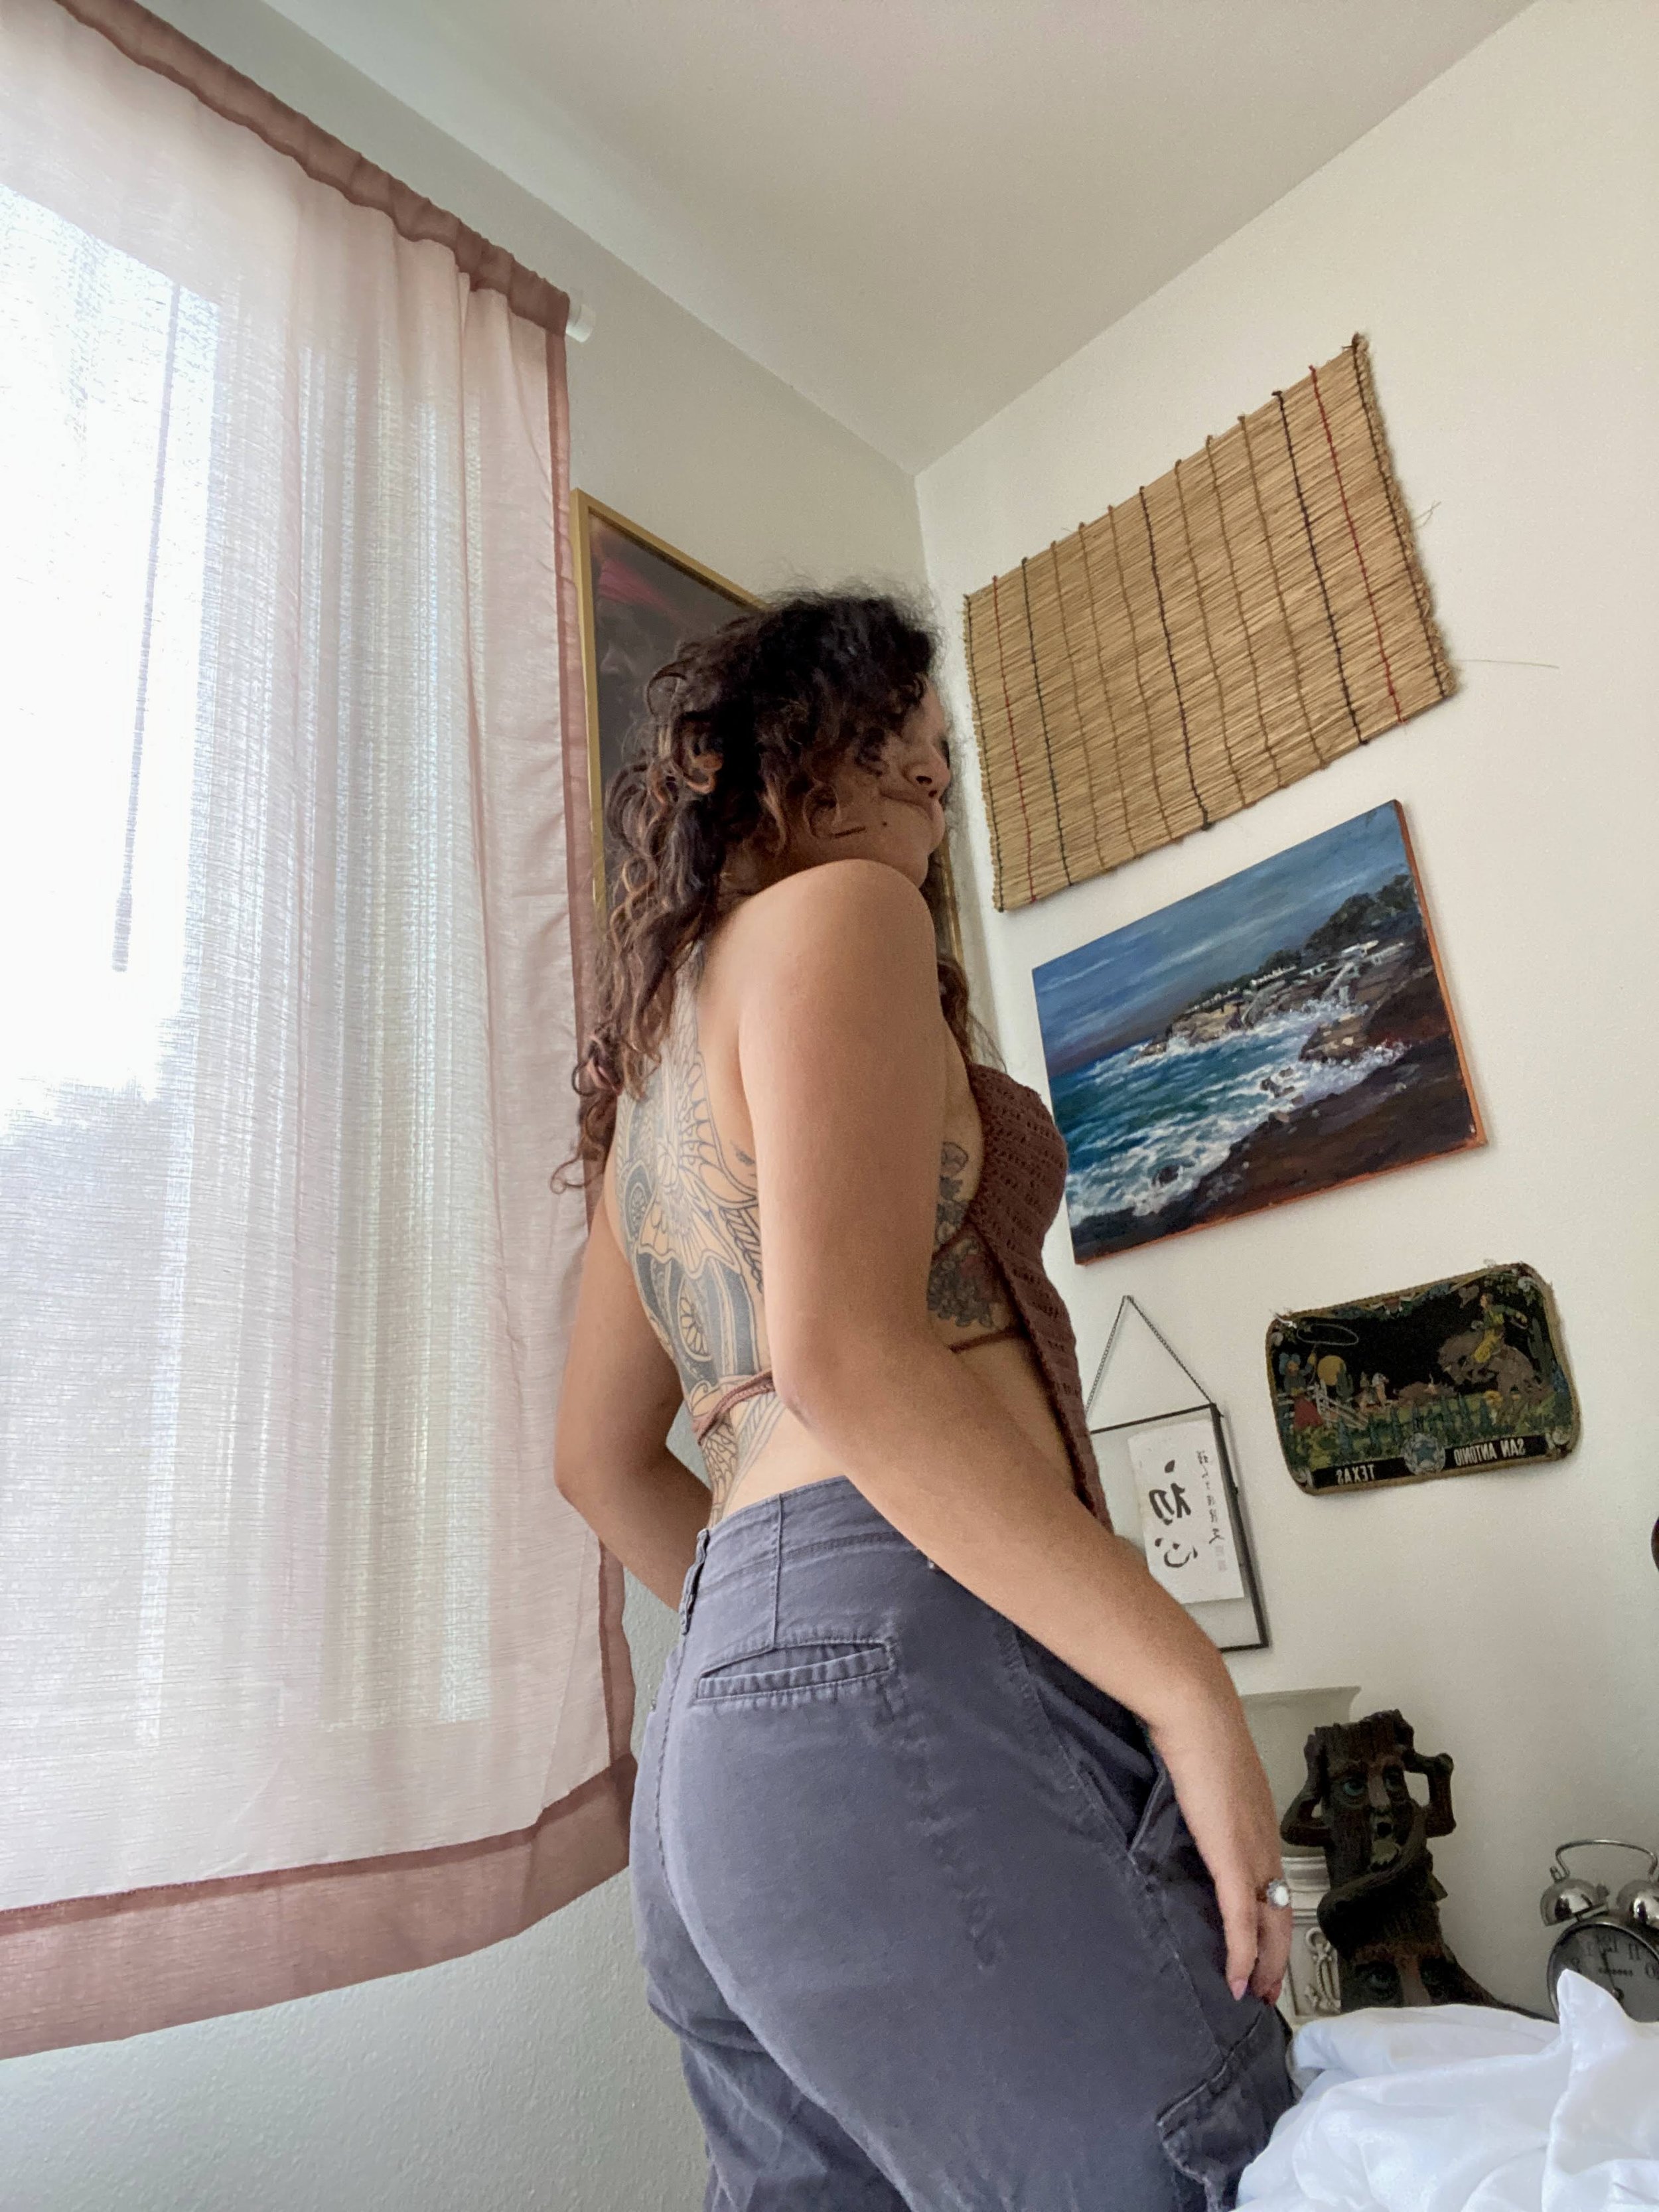
Now its time to form some casings for our straps to go through. Go ahead and fold back the flaps at the top of the bust. I folded back 6 dc so I’d still have a bit of extra width at the top
Alright now that we’ve got our casing folded back, cut a length of yarn about double the length of the casing and thread your tapestry needle with it. We’re going to be using a sewing technique called a whipstitch. The gist is you pick up some of fabric from the casing, and a small single loop on the back of a dc from the main body (so it’s not visible from the front). Do this all the way through til you reach the end. Make sure to leave enough of a tail at the beginning to weave in. Weave in your ends and repeat on the other side!
STRAPS
Ok friends, we’re onto the last stage which is making the straps! I have a 36” bust with a broader back for my frame so 310ch was just the right length for me! You want to make sure you have lots of length so you can tie it in as many ways as possible. Here’s what I would generally recommend
36” bust ~ 300ch
For every 2” difference +/- 20ch (ex. 34” bust —> 280ch)
Make sure to keep your body type in mind! I know I have a broader back so I added 10ch to mine. Maybe if you have a large bust you’ll want extra chains to wrap the tie around yourself multiple times to offer more support!
Once you finish your chain, go back and slst all the way back down. You will need to make 2 straps!
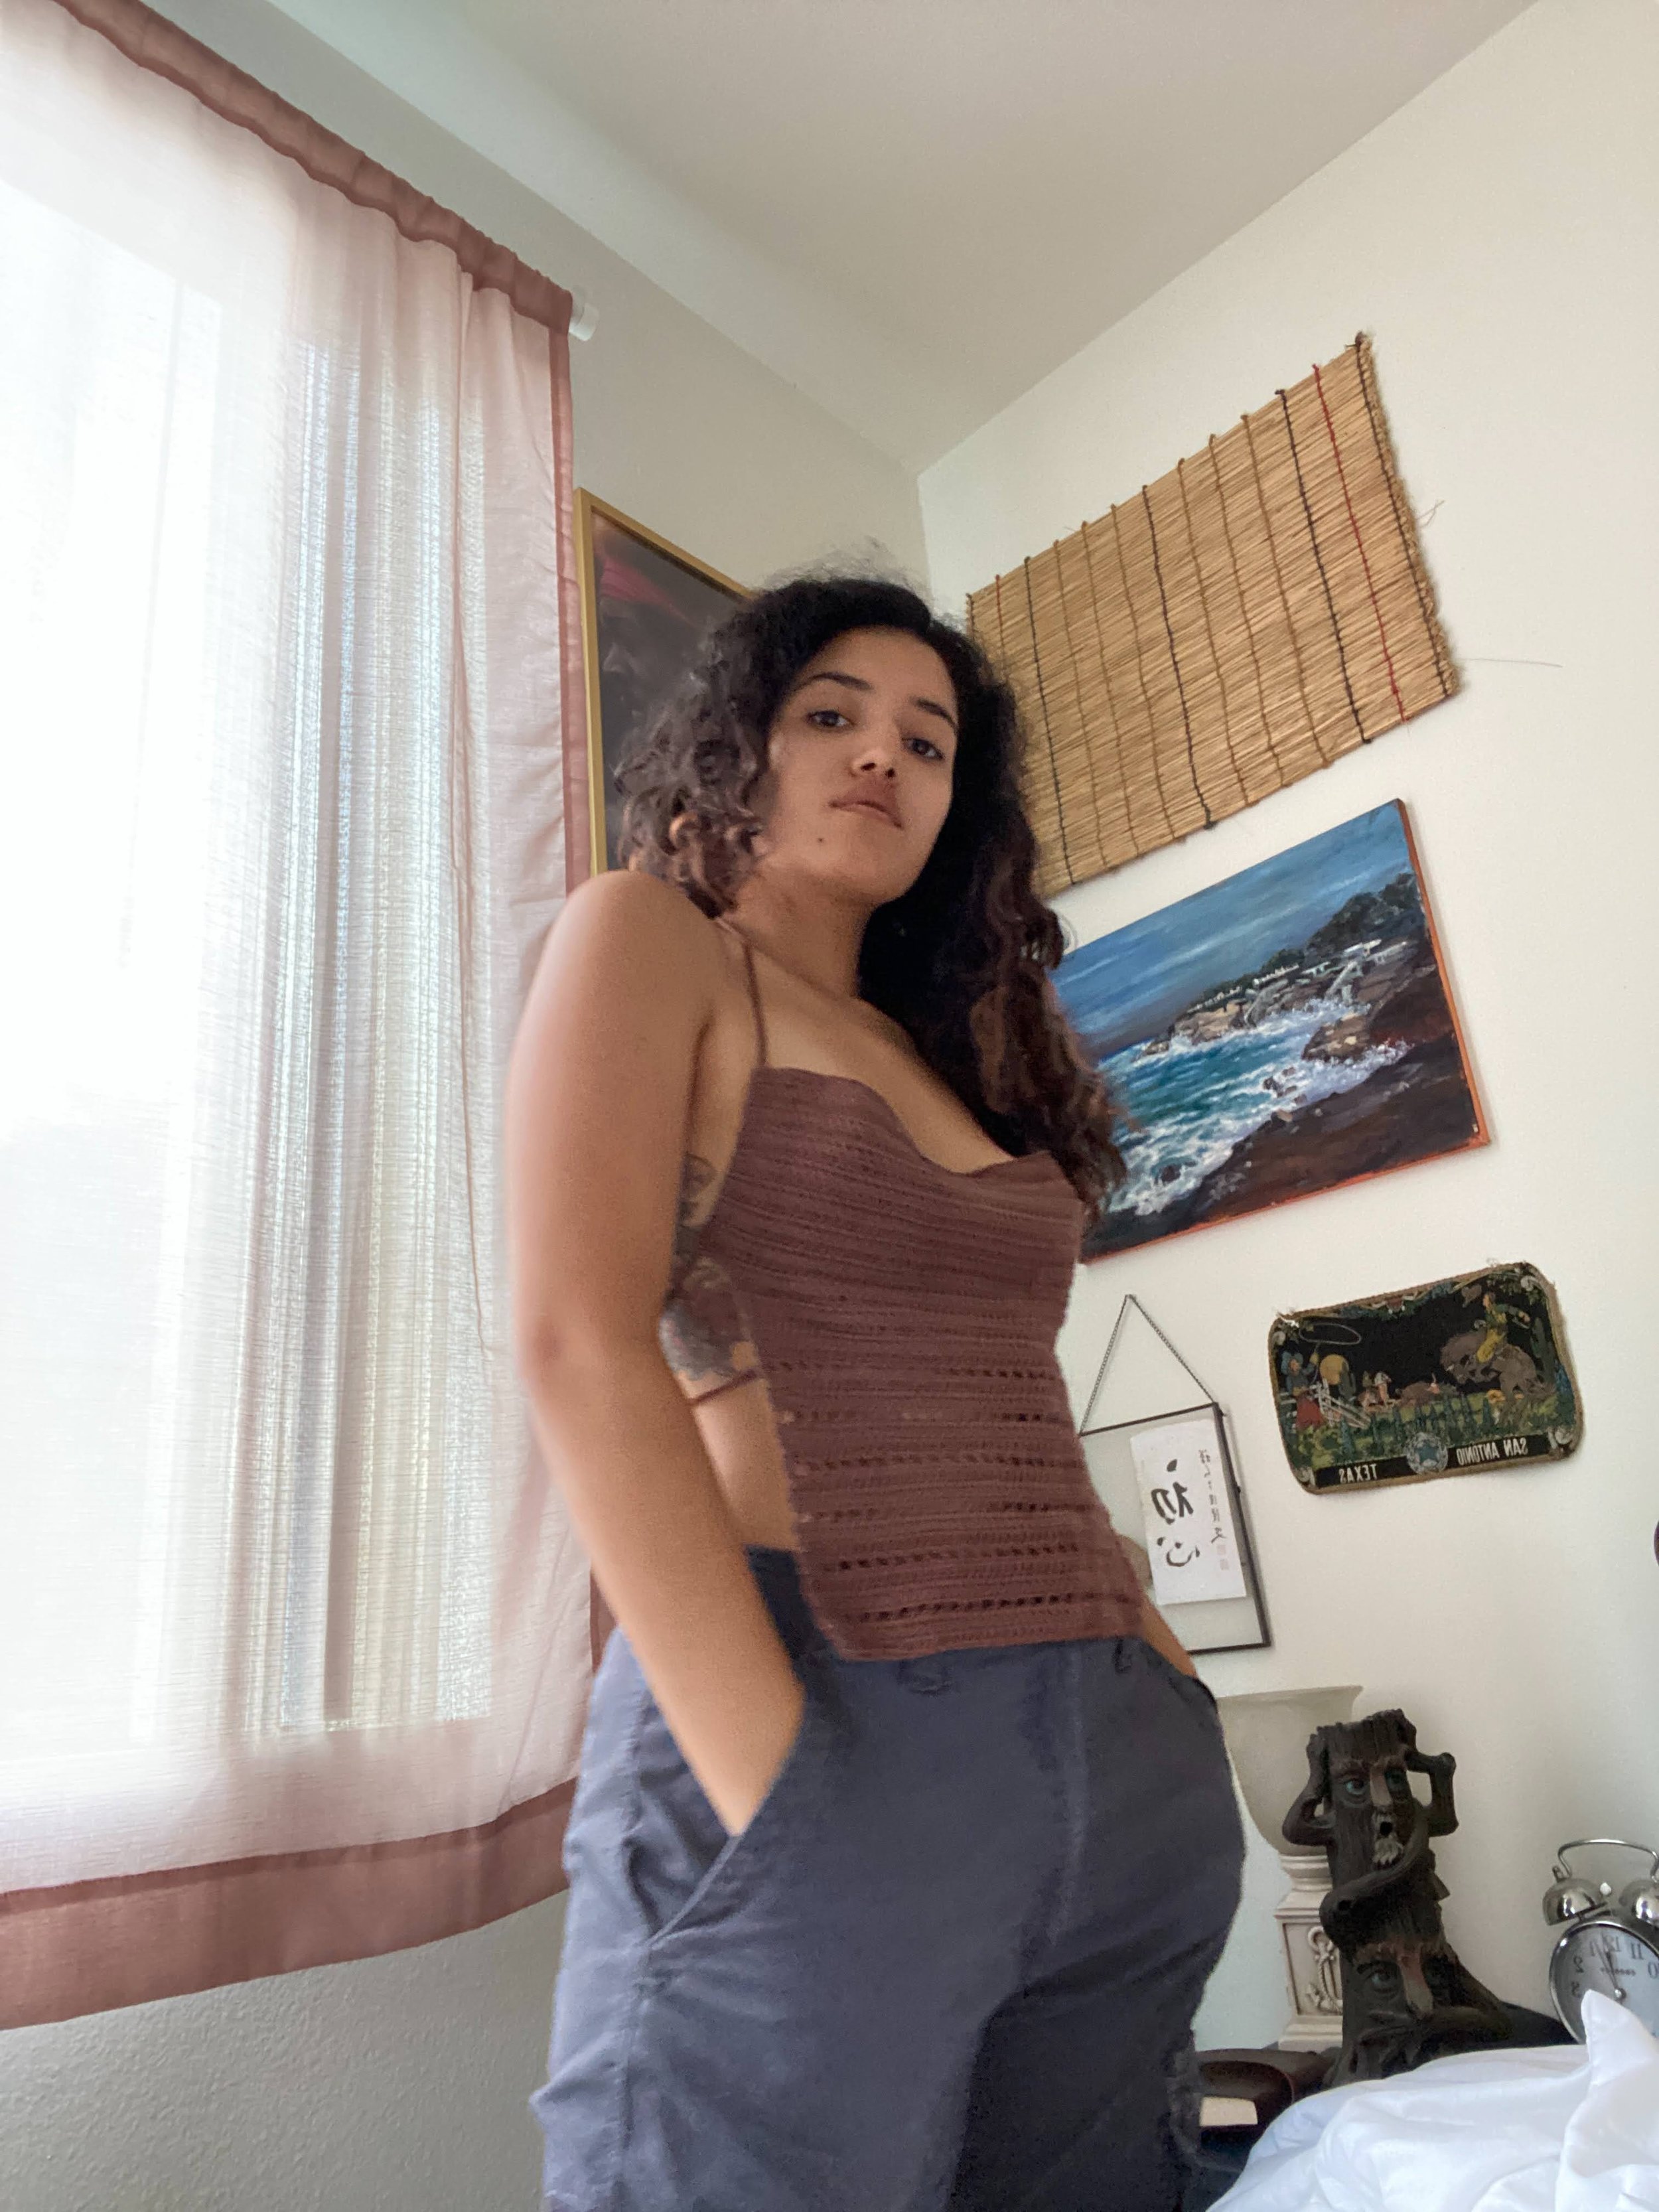
TYING THE TOP
Woohoo! Now its time for the fun part. I’ll be showing you my two favorite ways to tie this top, but of course, play around and see which way is your favorite. The possibilities are endless so go crazy!
Quick Tip: I’ve found that using a crochet hook to pull the strap through is the simplest way for me!
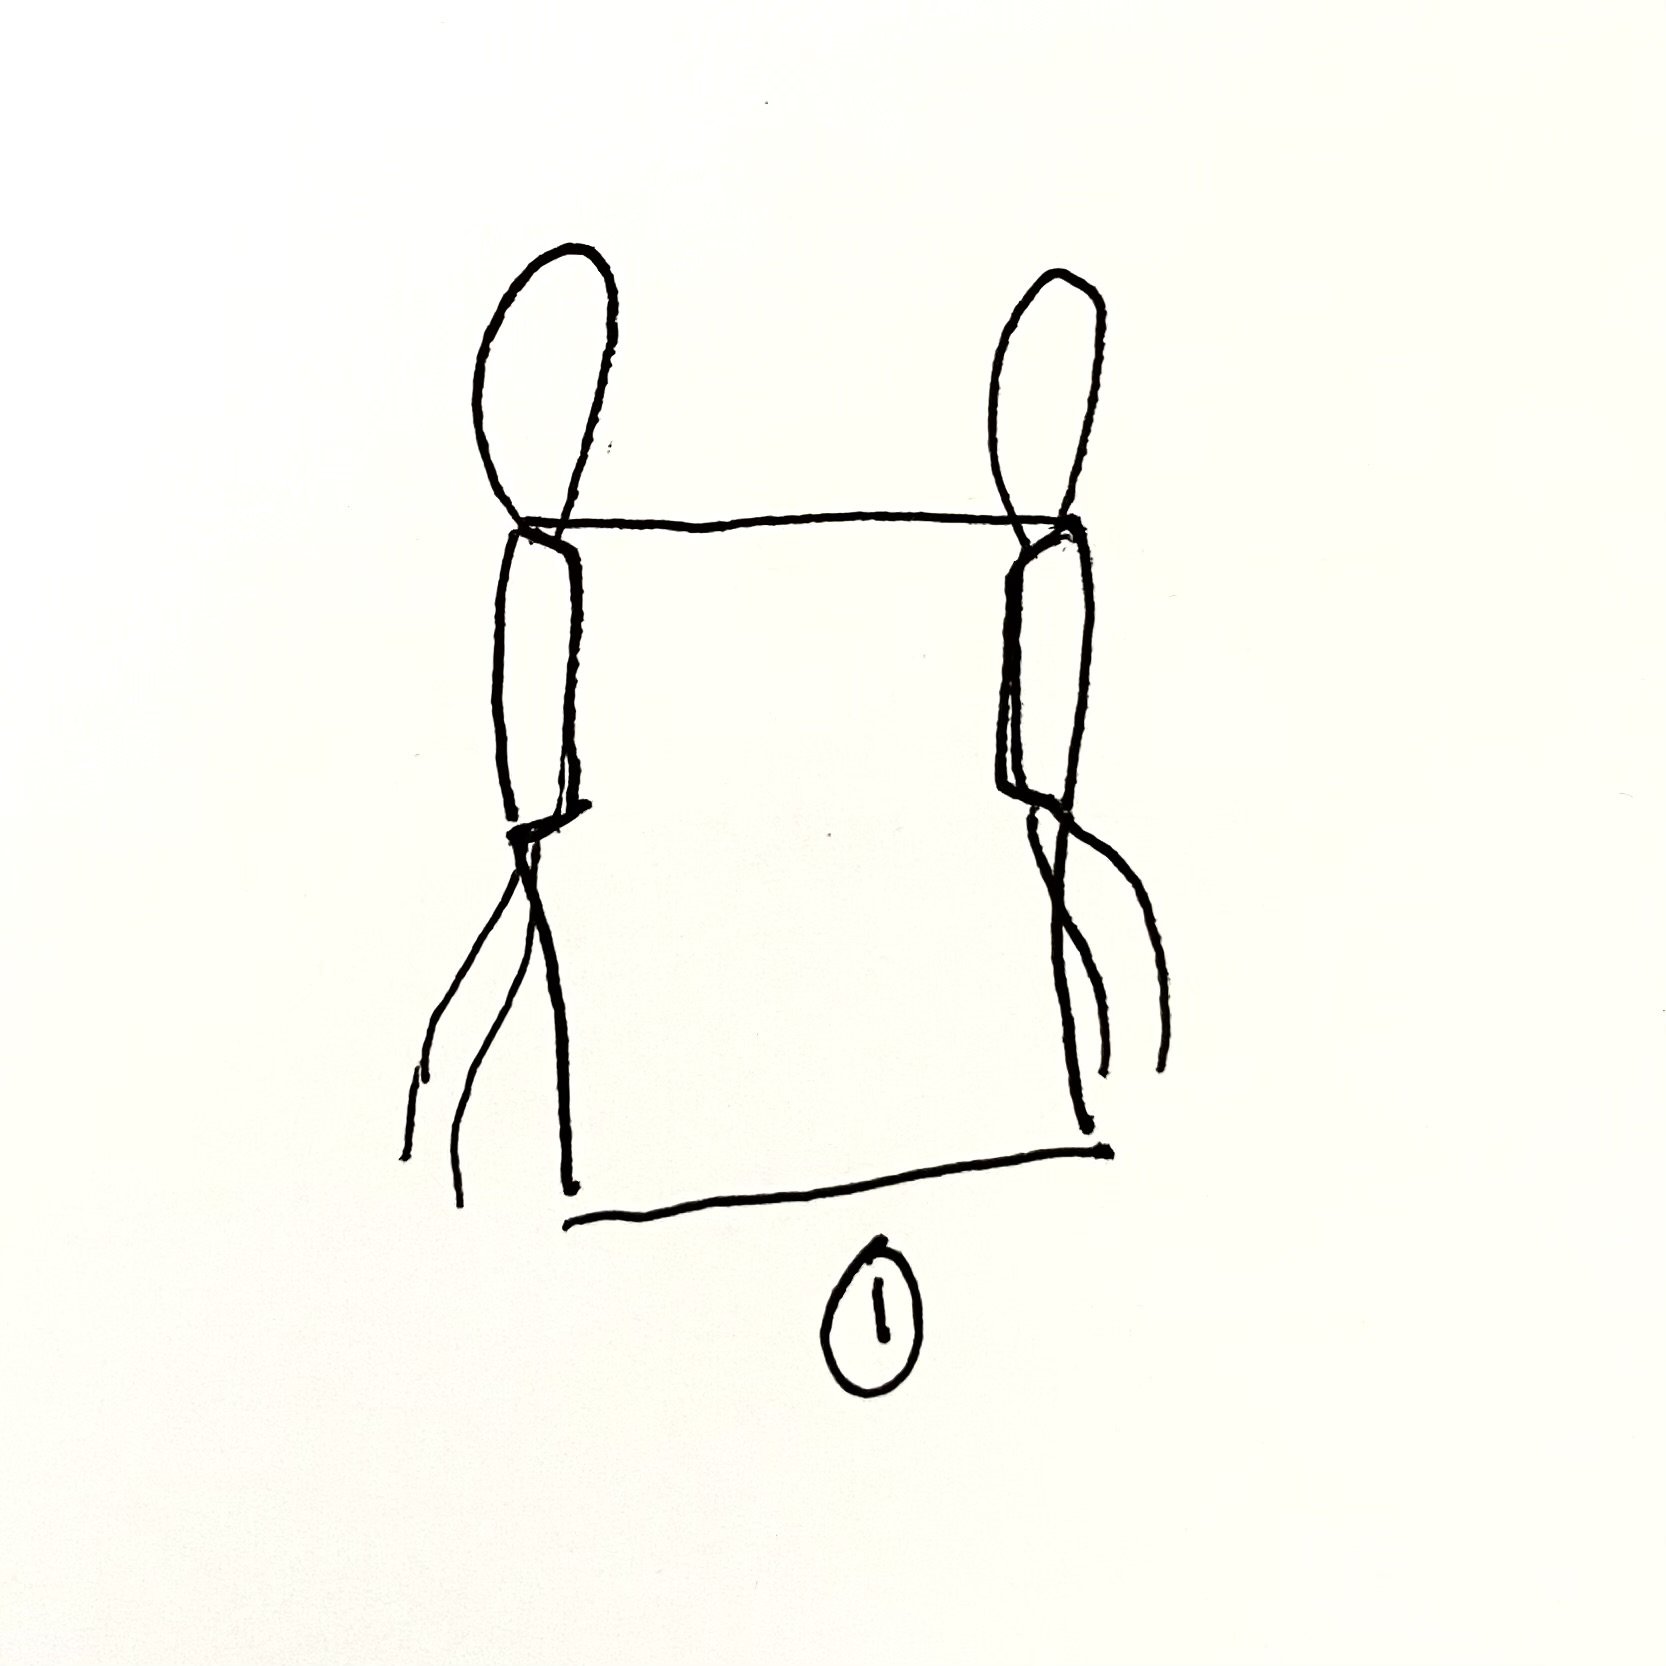
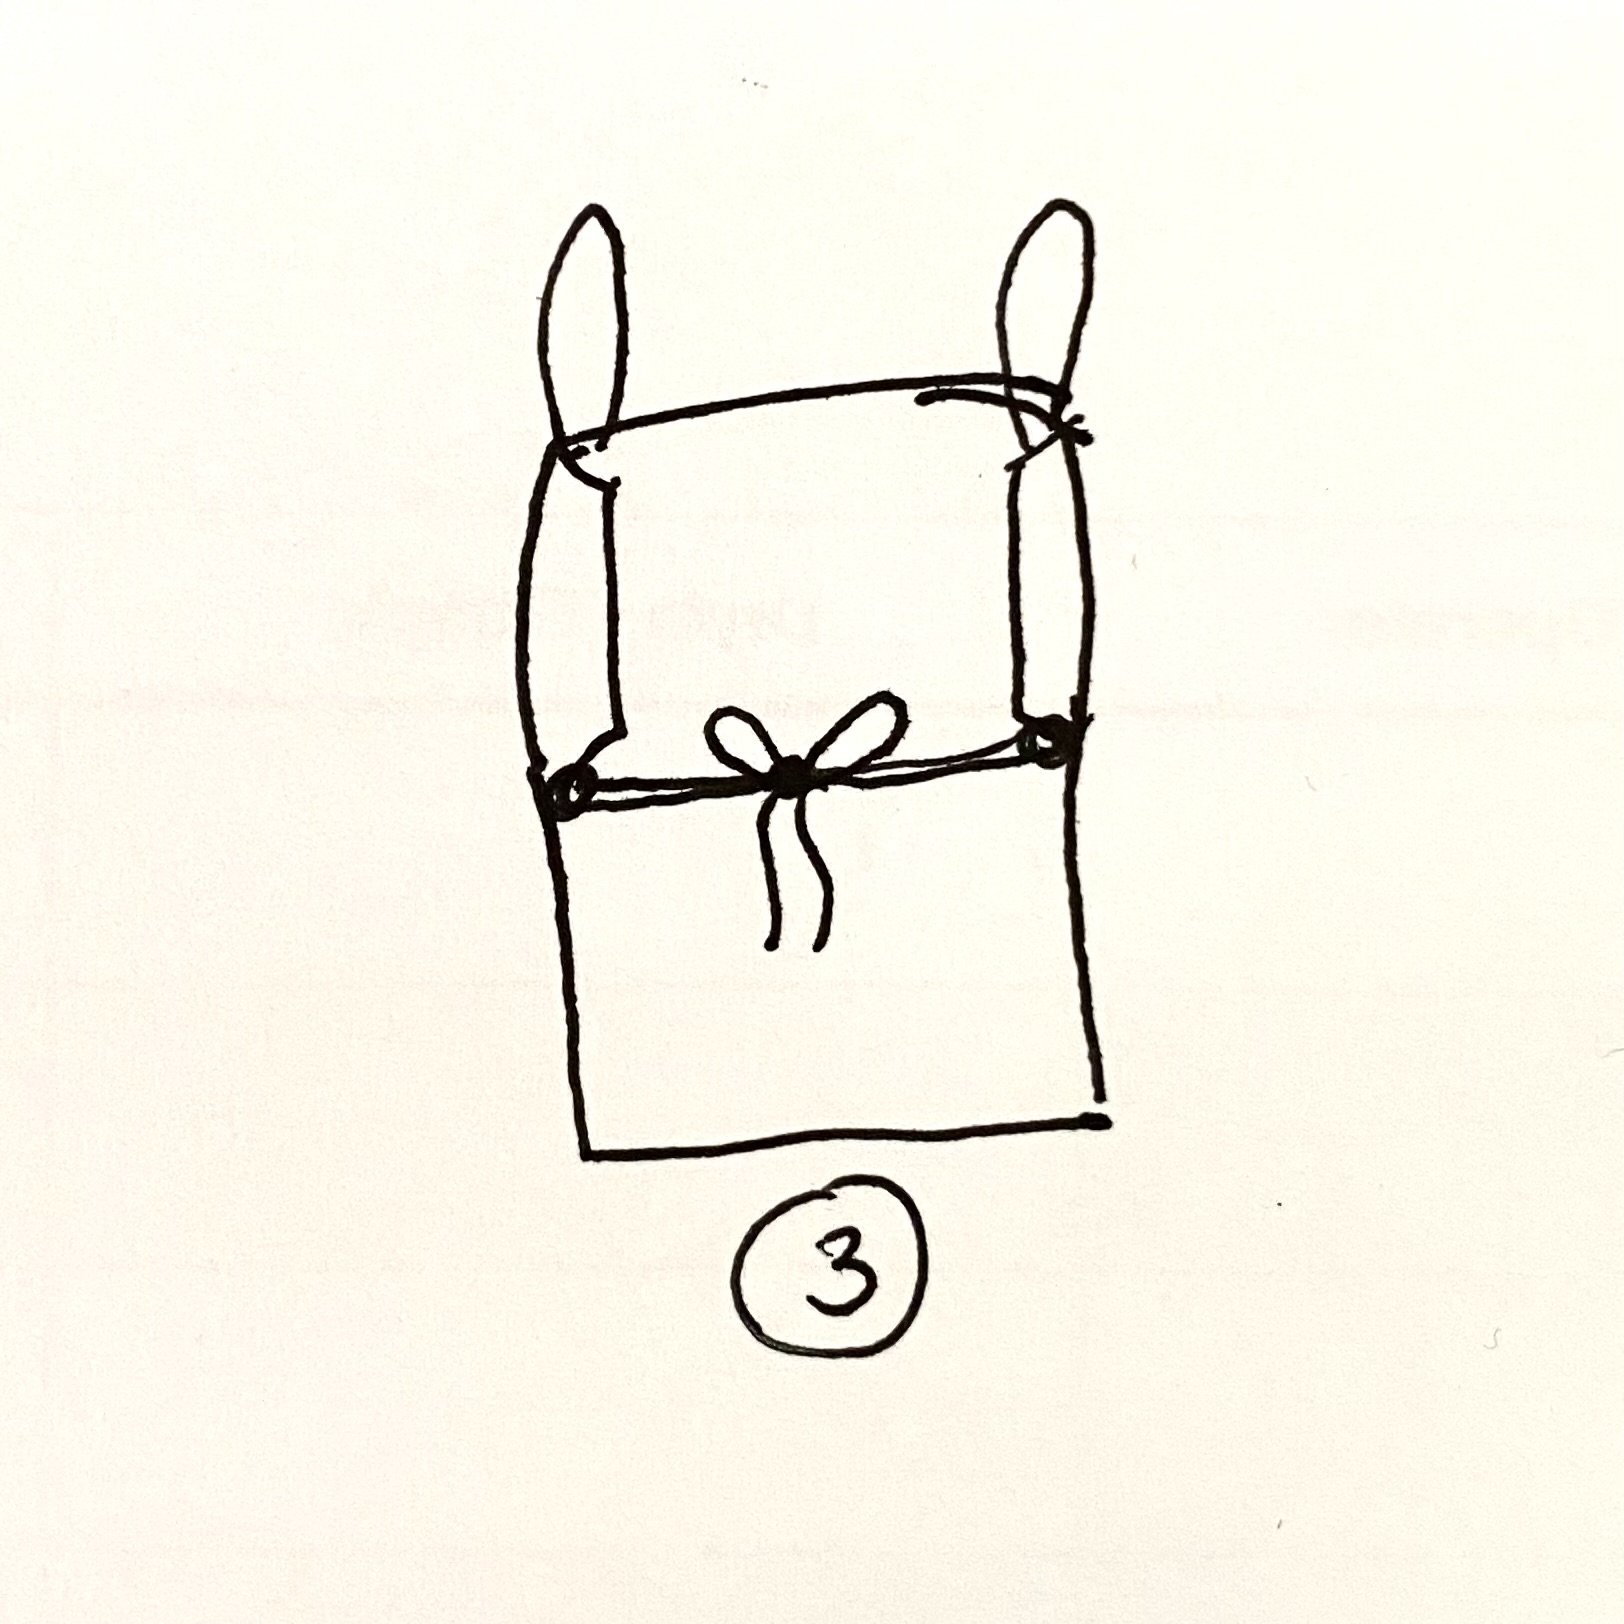
Square Neck Option:
For this option, start by folding your straps in half and pulling it through the casing so you end up with a loop at the top of the casing and 2 ends at the bottom. These loops will go around your arm to form straps!
To make your arm straps extra secure, put the top on and find the point at which your strap feels secure. Pinch that point and tie a knot to secure it in place. I like to tie a double knot at the bottom of the casing so it’s also serving to keep the top in place. Once you’ve done this on both sides, take the ends, tie them across your back, and you’re ready to go!
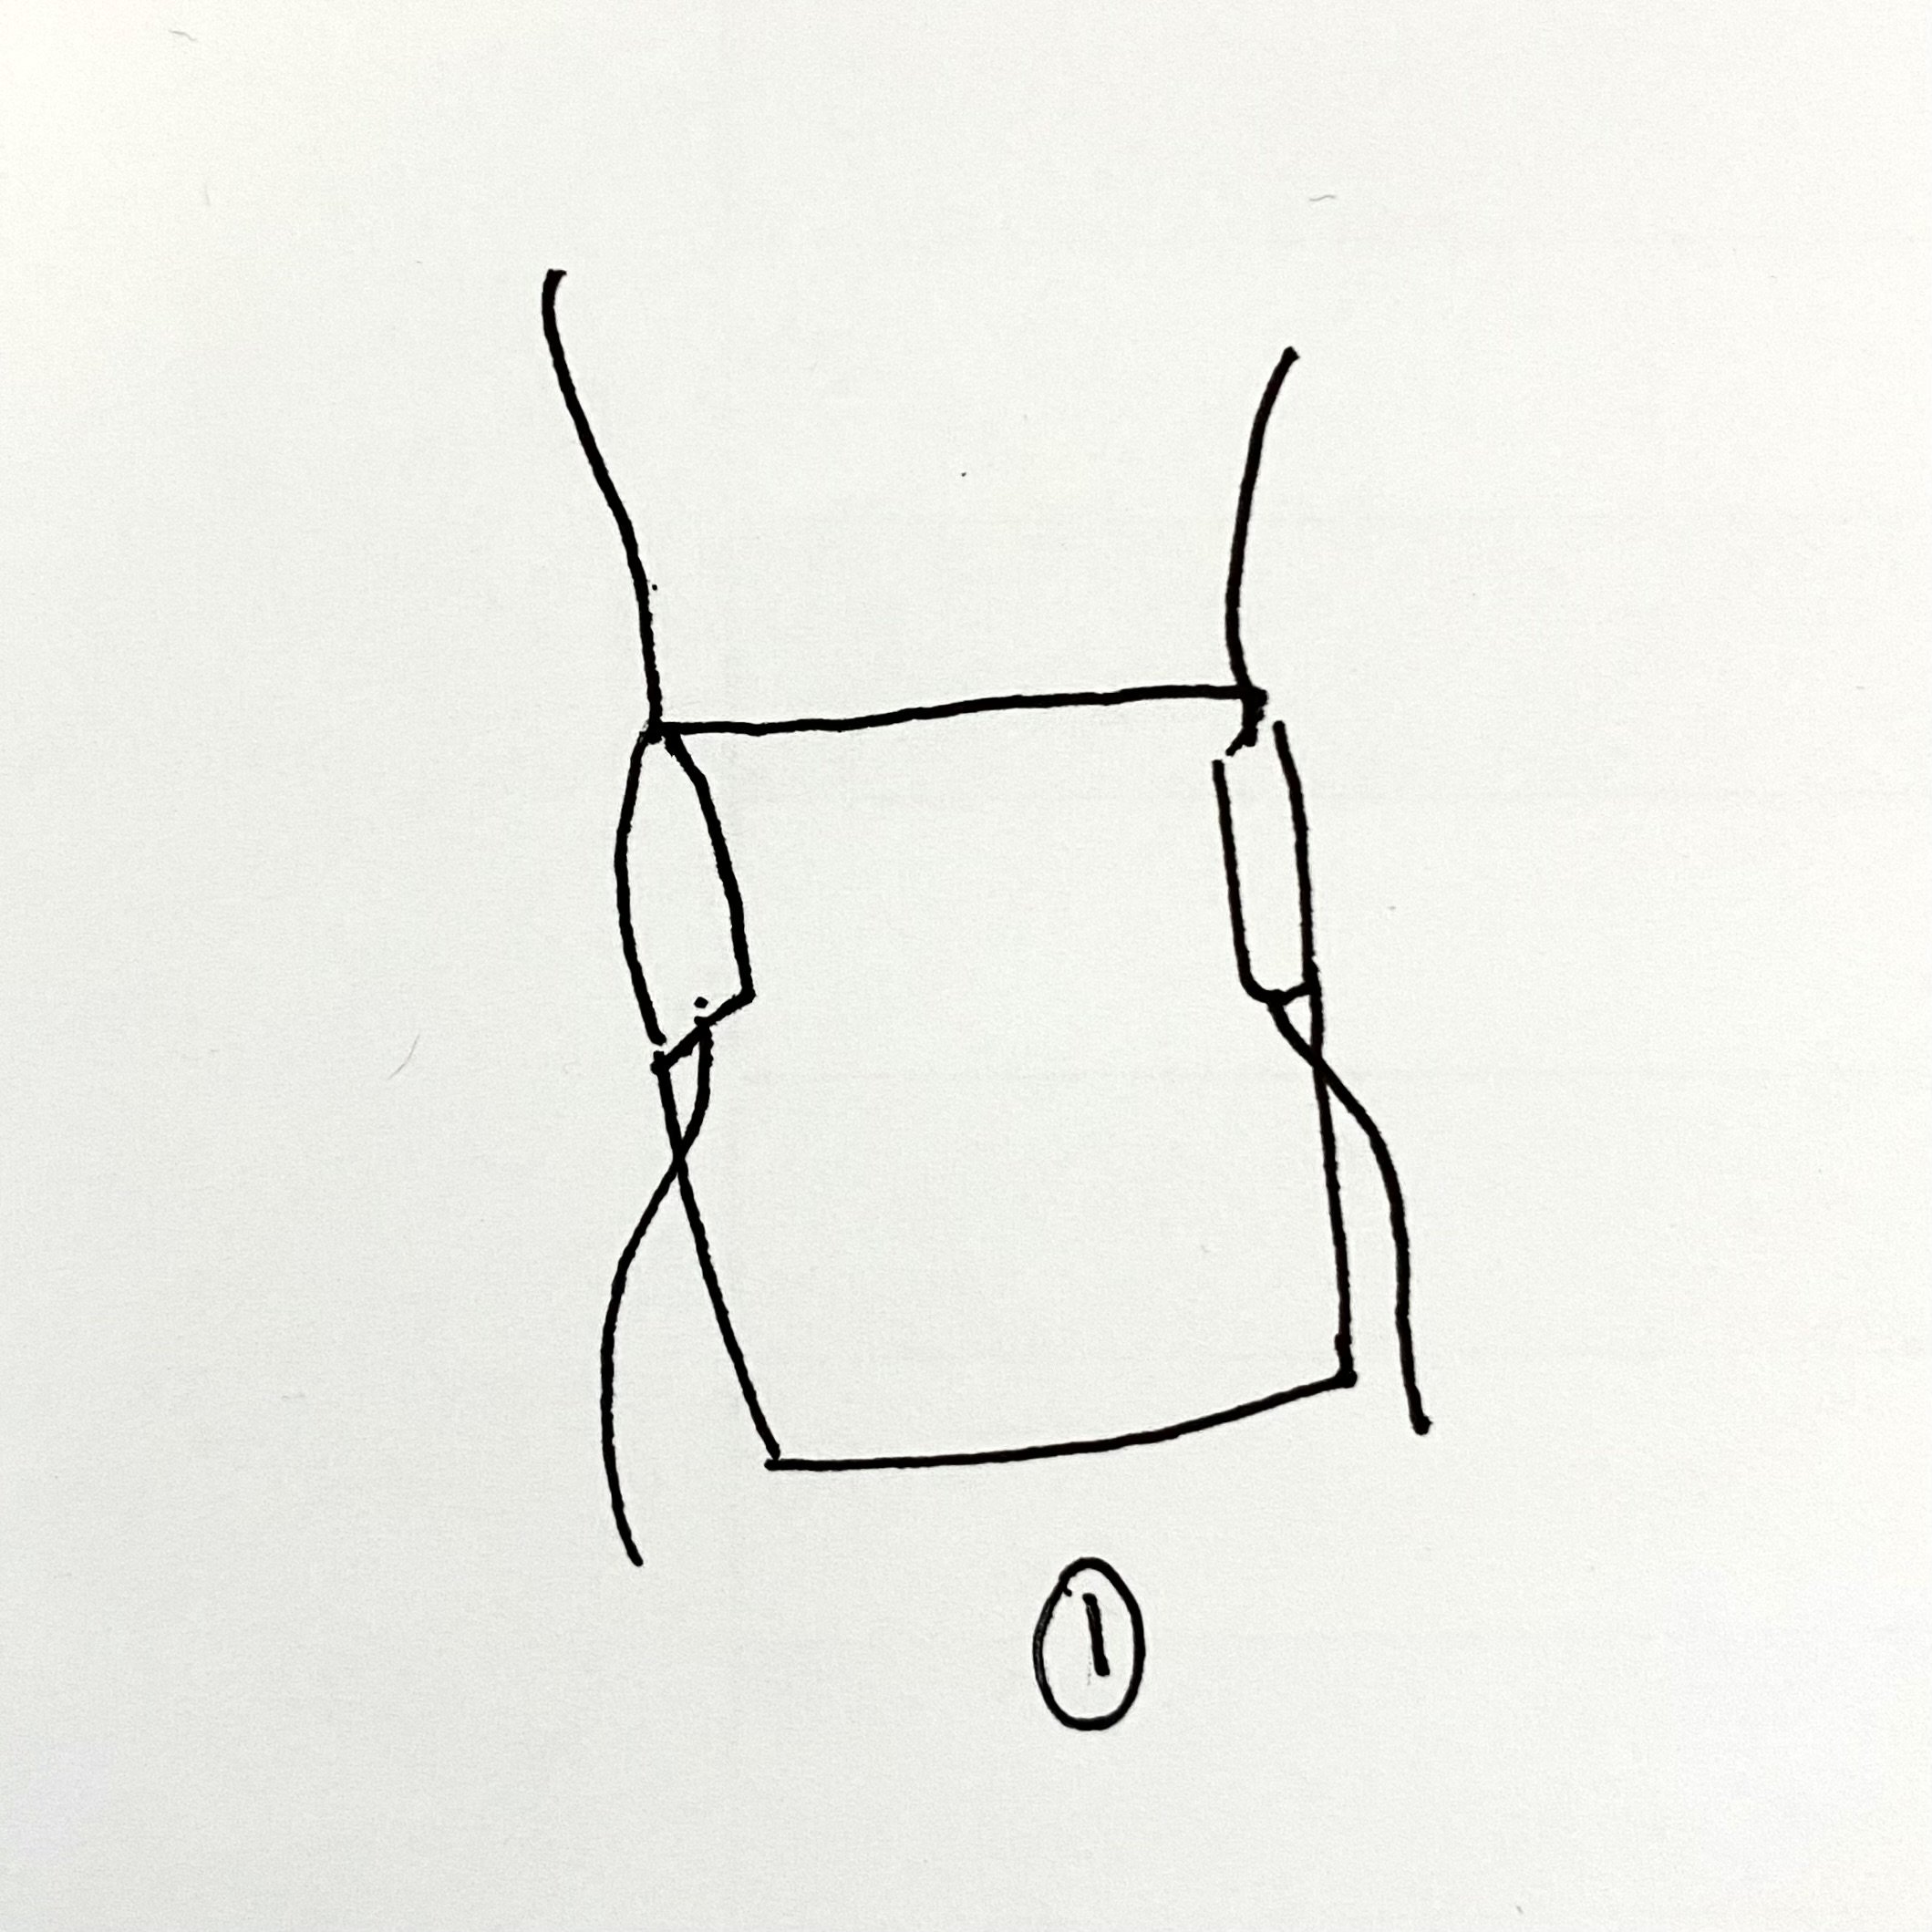
Cowl Neck Option:
This is my personal go-to and favorite. It’s super comfortable and I never have to worry about adjusting it while I’m out and about!
For this option, pull the strap through the casing straight through (no loop this time!), Take a strap from each side and tie it at the top to form a halter that goes around your neck.
Pop the top on and adjust until you like where it’s sitting. Since the remaining straps are pretty long I like to wrap them so they form an X in the back and tie it at the front of my body so it’s covered by the top! This makes it extra secure and I love how sleek the top looks without a knot in the center of your back.
You can also consider feeding the ties through the edges of the lattice rows for a more corset-style back!
Finish weaving in any stray ends and you’re ready to go!
I can’t wait to see what you make! Be sure to tag me so I can see and share your work :)

TERMS AND CONDITIONS
Thank you so much for all the love on this design, your support means the world to me and helps my small business so much. I can’t wait to see what you create!
This pattern is made strictly for personal use only. The copying, distributing, or commercial use of any part of this pattern is strictly prohibited. Including the filming of any videos based on this pattern. Please always give credit to me (@theyarnbitch) as the pattern designer. I am more than happy to share the beautiful work you create and hope you respect mine as well.
As this is a free pattern, you are not allowed to sell products created from this pattern. I hope that you use the techniques you learn from this pattern to create your own original designs!
Thank you and much love!
xx Dani